Intro
- Build a reactive microservice at your pace: Armeria는 아주 작고 단순한 형태로부터 시작해 점차 서비스를 키울 수 있게 해줍니다.
- your go-to microservice framework for any situation: 어떤 상황에서도 마이크로소프트를 만들 수 있는 프레임워크 입니다. gRPC, Thrift, GraphQL 등의 프로토콜도 지원합니다.
최근 학습을 하다보면 비동기와 논블로킹이라는 키워드가 참 많이 보입니다. 부끄럽지만 저는 항상 Java로 동기식 서버만을 작성해와서 잘 모릅니다.
4개월 쯤 전 프로젝트의 스프링부트 버전을 1.x -> 2.x 으로 마이그레이션 하기 위해 그 차이를 학습중에 스프링 5의 WebFlux 라는게 눈에 들어왔는데, 비동기 REST API를 작성할 수 있게 해준다고 합니다. 그때쯤 마침 즐겨보는 유투브 채널 중 하나인 라인개발실록에서는 Armeria 에 대한 내용이 올라와서 Webflux 대한 궁금증과 연관되어 흥미롭게 보았습니다.
재직중인 회사에서의 비즈니스 요구사항은 기존의 MVC 애플리케이션으로도 충분히 잘 동작 하고 있기 때문에 Reactive Programming을 접할 기회는 없었지만 그건 뭐가 어떻게 다른데?에 대한 궁금증은 쉽게 사라지지 않았습니다.
그러던 중 다음주에 있을 인프콘에서 개발을 맡은 LINE팀의 Armeria에 대한 핸즈온 세션이 있다기에 바로 신청을 했고, 이번 기회에 튜토리얼부터 시작해 알아보는 시간을 가져보려고 합니다. 선행학습이 이루어진다면 해당 발표 세션에서 좀 더 많은걸 얻을 수 있지 않을까하는 기대가 됩니다.
사실 해보기 전에는 너무 어렵지 않을까 하는 막연한 두려움이 있는데요. 정말 쉽고 따라하기 좋게 튜토리얼이 준비되어있으니 한번 편하게 해보시길 추천해요. 튜토리얼은 https://armeria.dev/tutorials 를 step-by-step 으로 따라갔습니다.
1. 프로젝트 생성
서버인스턴스를 생성하기 위해 프로젝트를 생성하겠습니다.
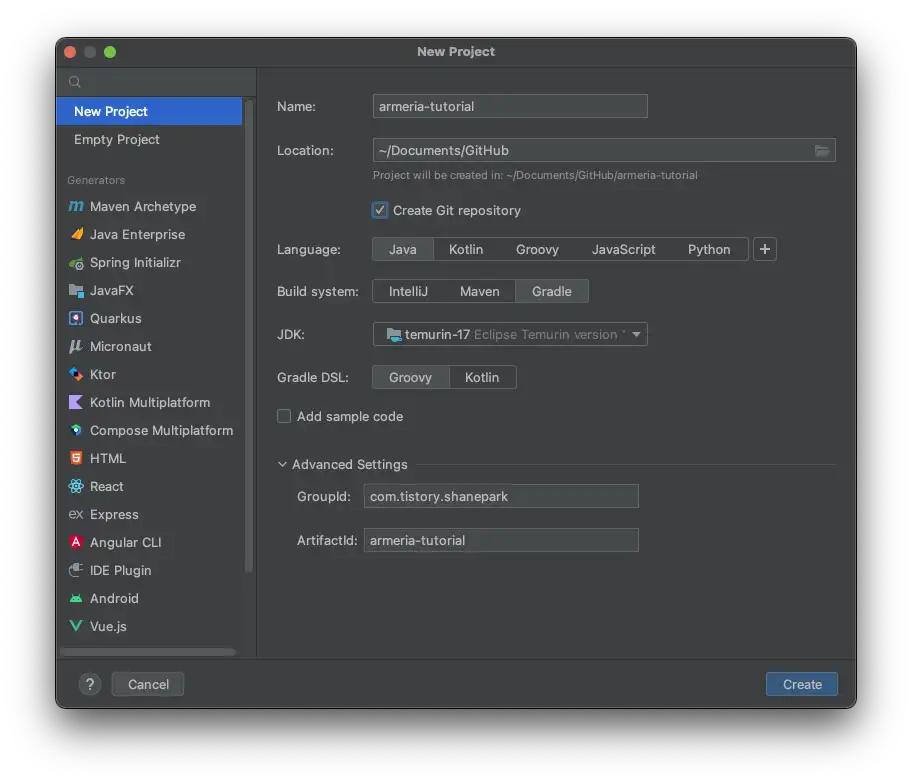
그동안 거의 Spring Initializr만을 사용 해 왔지만, 오랜만에 new Project를 이용해 프로젝트를 생성 해 보네요. 빌드시스템은 Gradle을 골라 줍니다.
참고로 Armeria의 요구사항은 JDK11+ 입니다. 11 버전 이상으로 골라주세요.
프로젝트를 생성 한 후에는 build.gradle에 아래의 내용을 추가 해 줍니다.
apply plugin: 'java'
apply plugin: 'idea'
apply plugin: 'eclipse'

repositories {
    mavenCentral()
}

dependencies {
    implementation "com.linecorp.armeria:armeria:1.18.0"

    // Logging
    runtimeOnly 'ch.qos.logback:logback-classic:1.2.11'
    runtimeOnly 'org.slf4j:log4j-over-slf4j:1.7.36'
}
추가 한 뒤 전체적인 build.gradle 파일은 아래와 같은 모습이 되었습니다.
plugins {
    id 'java'
}

group 'com.tistory.shanepark'
version '1.0-SNAPSHOT'

repositories {
    mavenCentral()
}

apply plugin: 'java'
apply plugin: 'idea'
apply plugin: 'eclipse'

dependencies {
    implementation "com.linecorp.armeria:armeria:1.18.0"
    // Logging
    runtimeOnly 'ch.qos.logback:logback-classic:1.2.11'
    runtimeOnly 'org.slf4j:log4j-over-slf4j:1.7.36'

    testImplementation 'org.junit.jupiter:junit-jupiter-api:5.9.0'
    testRuntimeOnly 'org.junit.jupiter:junit-jupiter-engine:5.9.0'
}

test {
    useJUnitPlatform()
}
2. 서버 생성
이제는 서버 인스턴스를 만듭니다.
Armeria의 ServerBuilder를 활용하면 아주 쉽게 서버를 만들 수 있는데요, Armeria는 어렵지 않을까 무작정 걱정했던 막연한 두려움이 온전히 해소되는 순간 입니다.
Main.java 클래스를 만들어 주세요.
Main.java
public class Main {
    private static final Logger log = LoggerFactory.getLogger(Main.class);

    static Server newServer(int port) {
        ServerBuilder builder = Server.builder();
        return builder.http(port)
                .service("/", (ctx, req) -> HttpResponse.of("Hello, Armeria!"))
                .build();
    }
}
정말 간단하죠? Hello, Armeria! 라는 응답을 보낼 수 있는 더미 서비스도 추가했습니다.
이후에는, 메인 함수에서 선언해 둔 newServer() 메서드로 서버를 생성해 start 해주기만 하면 됩니다.
public static void main(String[] args) {
  Server server = newServer(8080);
  server.closeOnJvmShutdown();
  server.start().join();
  log.info("Server has been started on http://localhost:{}", server.activeLocalPort());
}
전체적인 코드는 아래와 같은 모양입니다.
Main.java
public class Main {
private static final Logger log = LoggerFactory.getLogger(Main.class);
static Server newServer(int port) {
ServerBuilder builder = Server.builder();
return builder.http(port)
.service("/", (ctx, req) -> HttpResponse.of("Hello, Armeria!"))
.build();
}
public static void main(String[] args) {
Server server = newServer(8080);
server.closeOnJvmShutdown();
server.start().join();
log.info("Server has been started on http://localhost:{}", server.activeLocalPort());
}
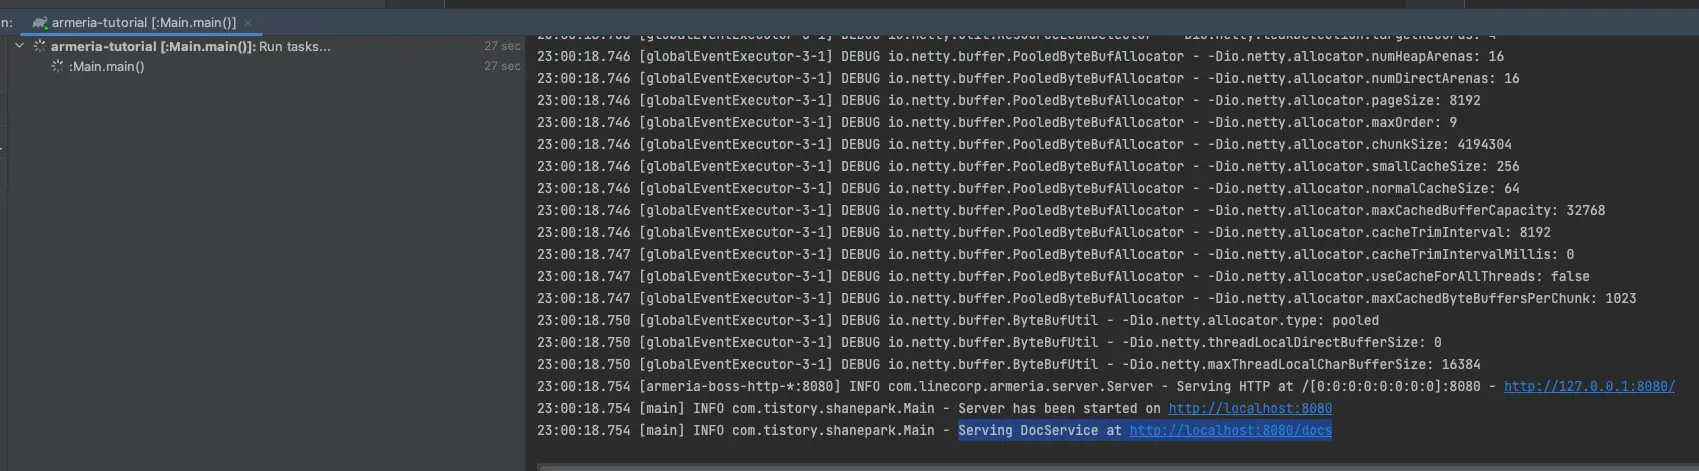
}이제 실행 해 보도록 하겠습니다.

8080 포트에서 서버가 실행 되었다는 로그가 확인 됩니다.
정말 응답을 처리 해 주는지 확인을 해 보도록 하겠습니다. localhost:8080으로 GET 요청을 보내면..
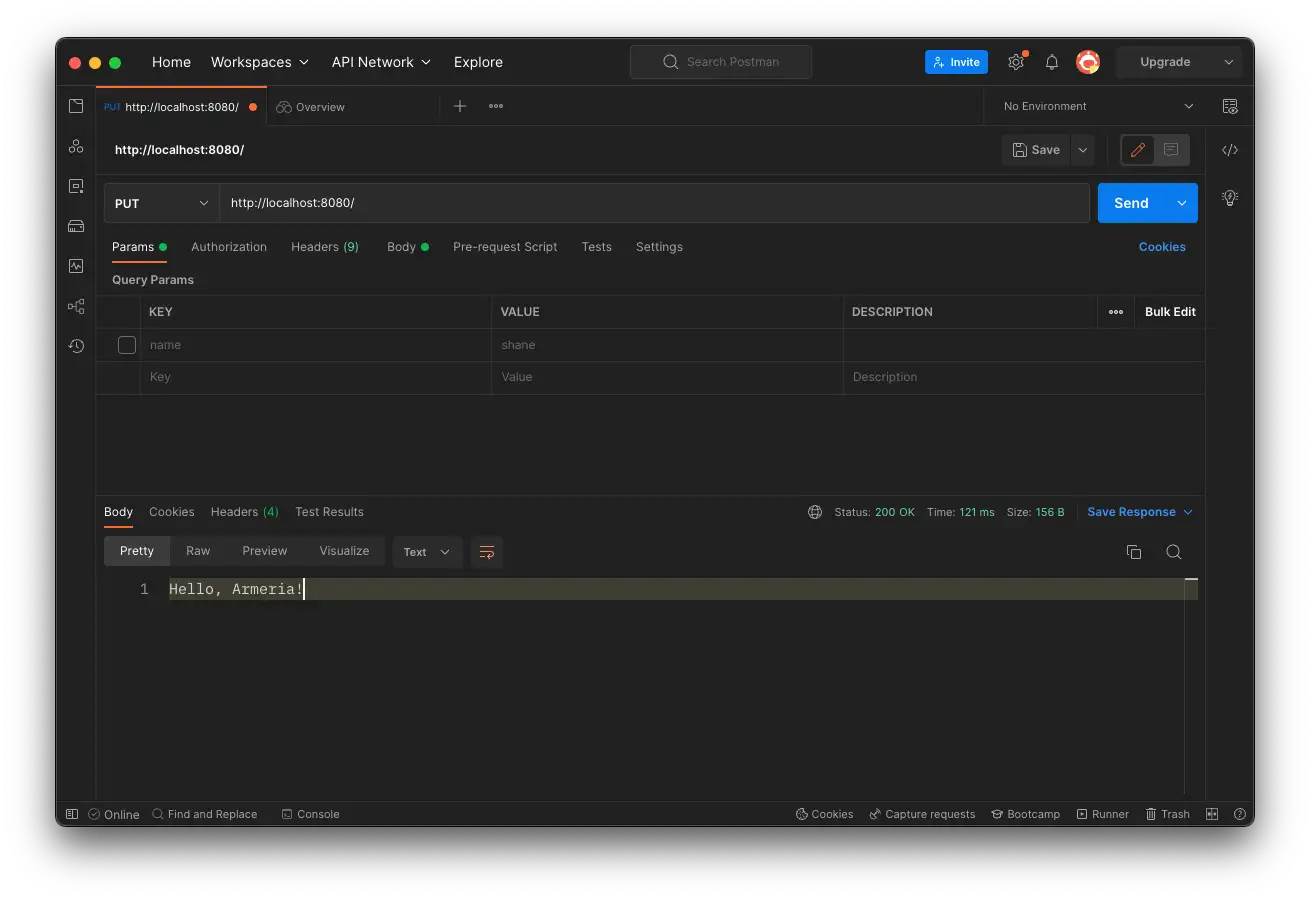
Hello, Armeria! 라는 응답을 보내 줍니다.
3. Data Object 생성
간단하게 게시판용도로 쓸 데이터 객체를 생성 해 주었습니다.
클래스는 원하는 대로 만들고, 생성자 및 getter 를 잊지 말고 생성해주세요.
public class Board {

    private Long id;
    private String title;
    private String content;
    private LocalDateTime createdAt;
    private LocalDateTime lastModifiedAt;

    public Board(Long id, String title, String content) {
        this.id = id;
        this.title = title;
        this.content = content;
        this.createdAt = LocalDateTime.now();
        this.lastModifiedAt = LocalDateTime.now();
    }

    public Long getId() {
        return id;
    }

    public String getTitle() {
        return title;
    }

    public String getContent() {
        return content;
    }

    public LocalDateTime getCreatedAt() {
        return createdAt;
    }

    public LocalDateTime getLastModifiedAt() {
        return lastModifiedAt;
    }
}
4. 서버에 서비스 추가
이제 서비스 파일을 만들 차례 입니다. 대강 파일만 생성 해 두고, 메서드 추가 및 구현은 나중에 할 예정 입니다.
서비스 파일 생성
BoardService.java
public class BoardService {
    private final Map<Long, Board> boards = new ConcurrentHashMap<>();
}
서버에 서비스 추가
Main.java 파일에서 서버에 서비스를 추가 하도록 합니다.
static Server newServer(int port) {
  ...
  return sb.http(port)
           .service("/", (ctx, req) -> HttpResponse.of("Hello, Armeria!")) // 해당 라인을 삭제합니다.
           .build();
위와같이 이전에 만들어 두었던 더미 서비스 3번 라인을 제거 한 뒤에
static Server newServer(int port) {
  ...
  return sb.http(port)
           .annotatedService(new BoardService())   // Add this
           .build();
}
annotatedService 를 추가 해 줍니다.
Documentation 서비스 추가
이번에는 Documentation 서비스를 추가 하도록 하겠습니다. API 문서라고 생각하시면 되요.
newServer() 메서드에 docService 를 추가 해 줍니다.
DocService docService = DocService.builder()
  .exampleRequests(BoardService.class,
                   "createBoard",
                   "{\"title\":\"My first board\", \"content\":\"Hello Armeria!\"}")
  .build();
이번에는 방금 만든 docService를 newServer() 메서드의 서버 빌더에 추가 해 줍니다.
return builder.http(port)
  .annotatedService(new BoardService())
  .serviceUnder("/docs", docService)
  .build();
이렇게 해서, 지금까지 완성된 Main.java 파일은 아래와 같습니다.
docService 경로에 대해 안내해주는 로그를 하나 추가 했습니다.
Main.java
public class Main {
    private static final Logger log = LoggerFactory.getLogger(Main.class);

    static Server newServer(int port) {
        ServerBuilder builder = Server.builder();
        DocService docService = DocService.builder()
                .exampleRequests(BoardService.class,
                        "createBoard",
                        "{\"title\":\"My first board\", \"content\":\"Hello Armeria!\"}")
                .build();

        return builder.http(port)
                .annotatedService(new BoardService())
                .serviceUnder("/docs", docService)
                .build();
    }

    public static void main(String[] args) {
        Server server = newServer(8080);
        server.closeOnJvmShutdown();
        server.start().join();
        log.info("Server has been started on http://localhost:{}", server.activeLocalPort());
        log.info("Serving DocService at http://localhost:{}/docs", server.activeLocalPort());
    }
}
자 이제 서버를 시작 해서 확인 해 보도록 하겠습니다.
doc을 확인하기 위해 localhost:8080/docs 페이지에 요청을 보내 보았습니다.
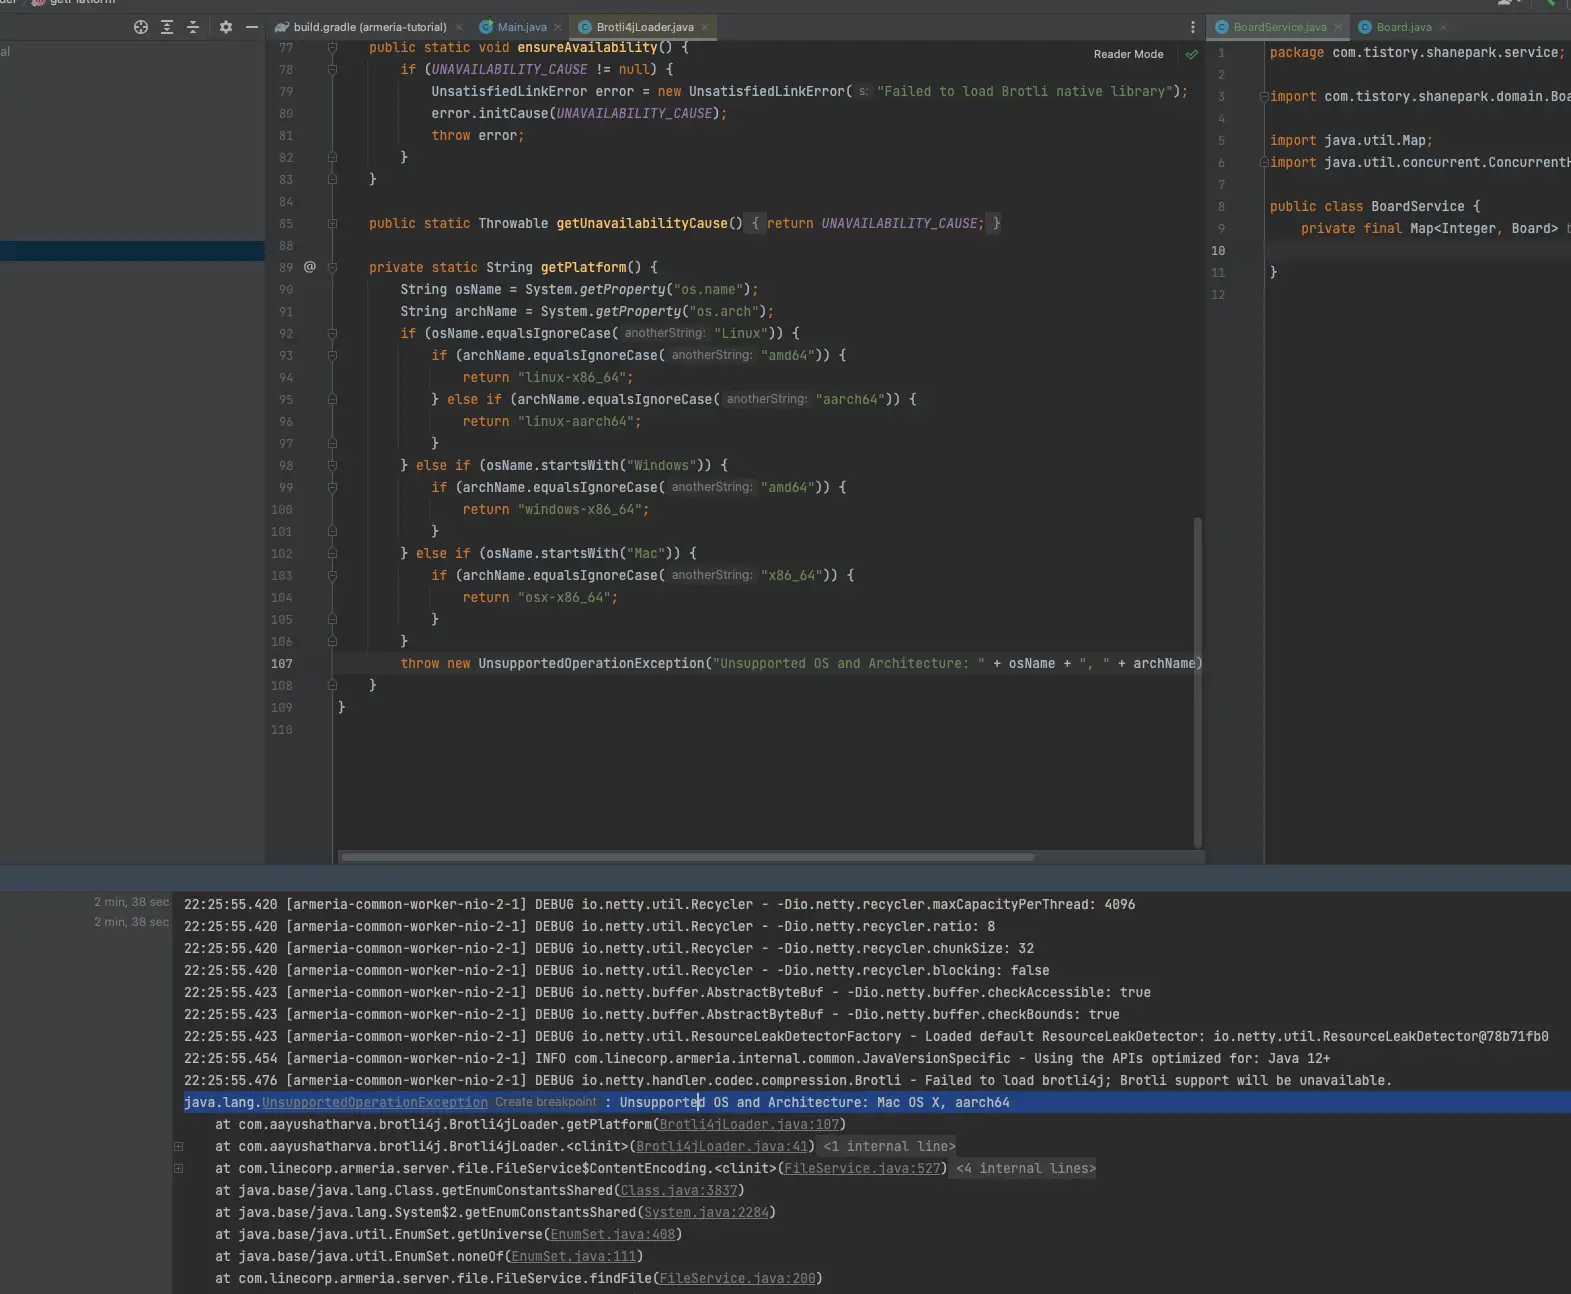
그런데 예상치 못한 java.lang.UnsupportedOperationException: Unsupported OS and Architecture: Mac OS X, aarch64 에러가 발생 하더라고요. 그래서 확인을 해 보니 포함된 Broti4j 라이브러리가 Apple Silicon을 아직 지원하지 못한 모양이에요.
제가 추가한 Armeria 1.18버전 에서는 brotli4j v1.7.1을 사용 하고 있었는데
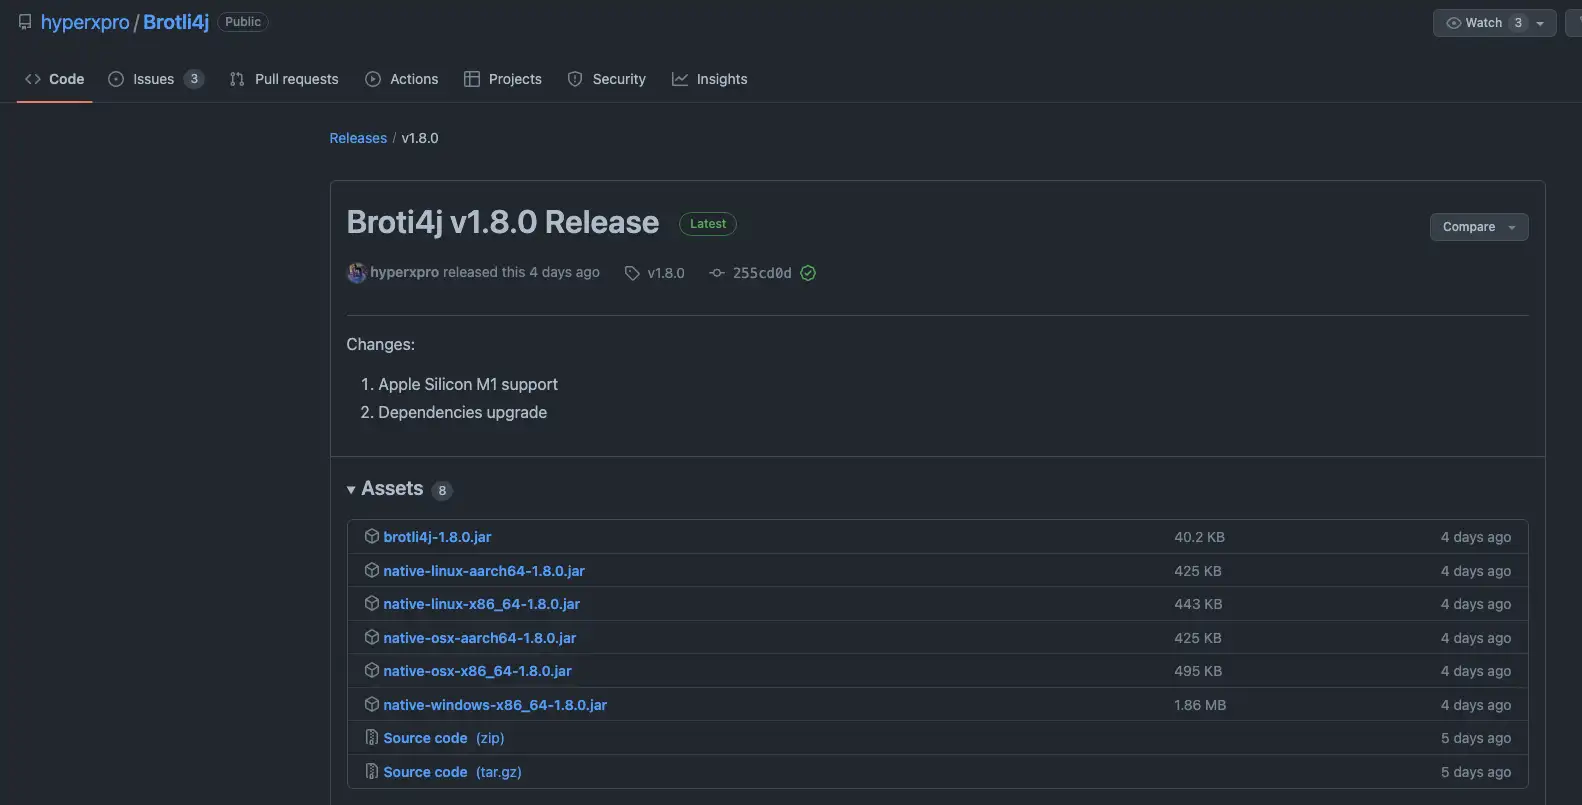
마침, 4일전에 추가된 brotli4j 1.8.0 버전 부터는 Apple Silicon M1 support 가 가능하다고 되어 있더라고요. 그래서 Broti4j의 버전을 올려서도 진행 해 보았는데, 이번에는 다른 에러(NPE)가 발생 하더라고요.
일단 튜토리얼을 진행 중이고, Broti4j 오류가 발생 해도 docs 확인에는 지장이 없으니 계속해서 진행을 해 보겠습니다.
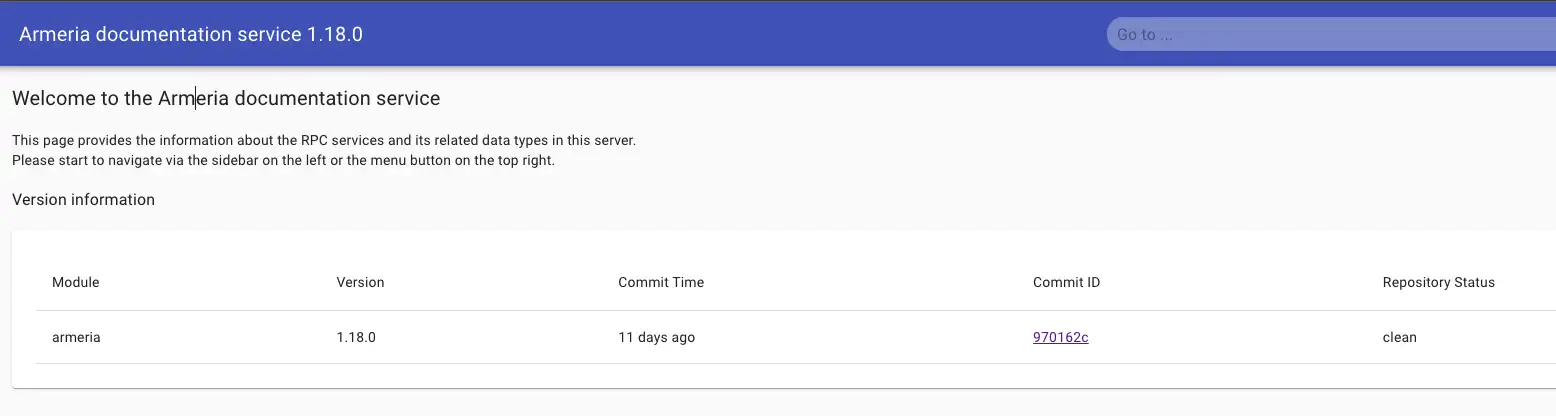
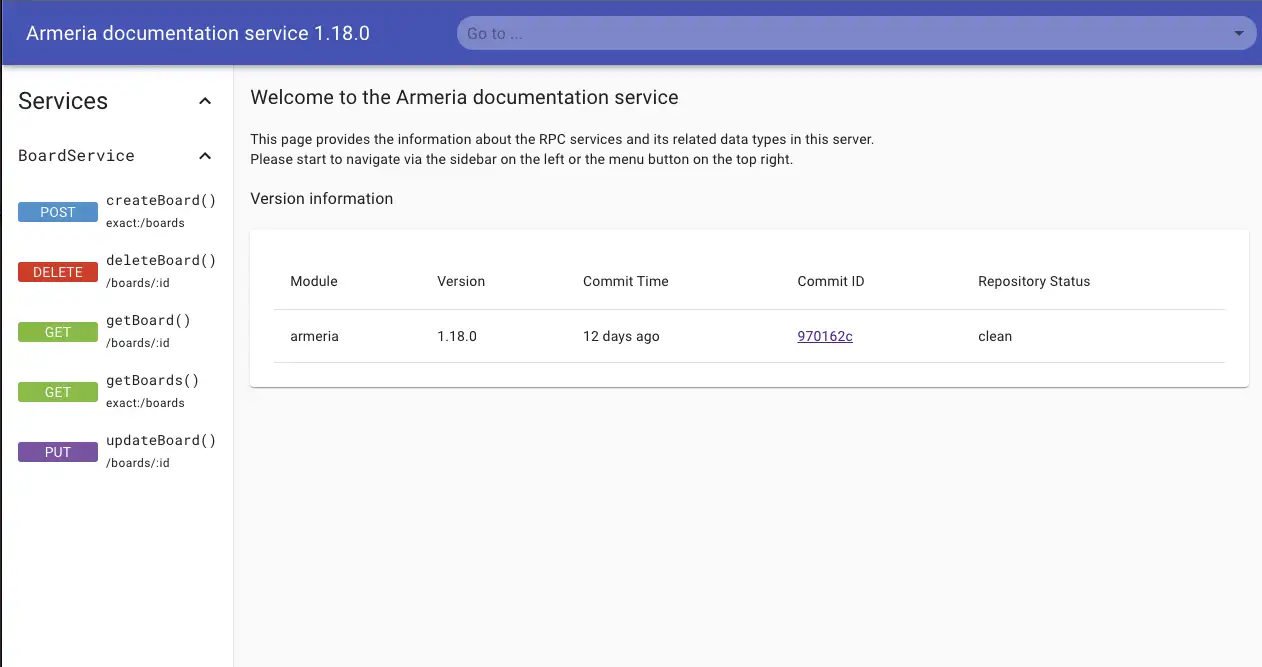
/docs 경로를 확인 해 보면 위와 같이 나오는데요, 아직 서비스가 등록 된 게 없어서 그렇습니다.
간단하게나마 BoardService 에 createBoard() 메서드를 생성 해 두고 @Post 어노테이션과 경로를 지정 해 주고 나서 다시 확인 해 보면
BoardService.java
public class BoardService {
    private final Map<Long, Board> boards = new ConcurrentHashMap<>();

    @Post("/boards")
    public void createBoard(Board board) {

    }

}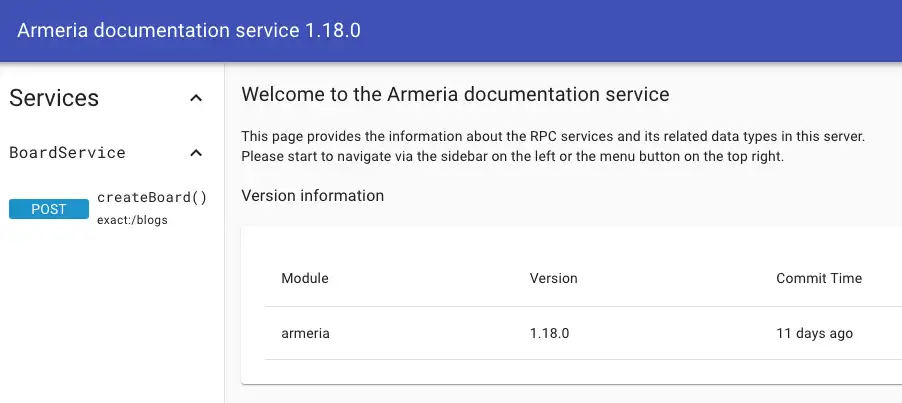
이번에는 docs 에서 서비스가 확인 됩니다.
5. CREATE 구현
이번에는 CRUD의 시작으로, 위에서 형태만 잡아 놓은 createBoard 를 구현 해 보도록 하겠습니다.
파라미터 핸들
새로운 Board 에 대한 내용을 request body 를 통해 받을건데요, Armeria의 request converter는 HTTP 메서드의 request parameters 를 자바 객체로 변경 해 줍니다. request converter 에서 JSON 객체의 어떤 키가 자바 객체의 어떤 프로퍼티에 매핑이 되어야 하는지만 정의 해 주면 됩니다.
Armeria의 기본 JacksonRequestConverterFunction을 그대로 사용 할 수도 있지만, 튜토리얼에 나온대로 커스터마이징을 한번 진행 해 보도록 하겠습니다. RequestConverterFunction 를 구현해주시면 됩니다.
BoardPostRequestConverter.java
public class BoardPostRequestConverter implements RequestConverterFunction {

    private static final ObjectMapper mapper = new ObjectMapper();
    private AtomicLong idGenerator = new AtomicLong();

    static String stringValue(JsonNode jsonNode, String field) {
        JsonNode value = jsonNode.get(field);
        if (value == null) {
            throw new IllegalArgumentException(field + " is missing!");
        }
        return value.textValue();
    }

    @Override
    public @Nullable Object convertRequest(
            ServiceRequestContext ctx
            , AggregatedHttpRequest request
            , Class<?> expectedResultType
            , @Nullable ParameterizedType expectedParameterizedResultType)
            throws Exception {
        if (expectedResultType == Board.class) {
            JsonNode jsonNode = mapper.readTree(request.contentUtf8());
            long id = idGenerator.getAndIncrement();
            String title = stringValue(jsonNode, "title");
            String content = stringValue(jsonNode, "content");
            return new Board(id, title, content);
        }
        return RequestConverterFunction.fallthrough();
    }
}
이제는 방금 생성한 request converter를 등록 해 주겠습니다.
BoardService.java
public class BoardService {
    private final Map<Long, Board> boards = new ConcurrentHashMap<>();

    @Post("/boards")
    @RequestConverter(BoardPostRequestConverter.class)
    public void createBoard(Board board) {

    }

}
서비스 객체에 @RequestConverter 어노테이션을 통해 손쉽게 등록 할 수 있습니다.
서비스 코드 구현
BoardService.java
@Post("/boards")
@RequestConverter(BoardPostRequestConverter.class)
public void createBoard(Board board) {
  boards.put(board.getId(), board);
}
DB가 아닌 메모리상의 Map을 활용한 간단한 서비스기 때문에 단순히 자료를 담아주기만 하면 됩니다.
응답 반환
이제 클라이언트에게 응답을 반환할 차례 입니다. 응답으로는 전달받은 정보에 추가적으로 ID 정보 및 생성시간과 최근 변경일을 담아 보내주게 됩니다. 그럼 응답 타입부터 변경 해 주어야겠죠? armeria.common의 HttpResponse로 변경 해 줍니다.
@Post("/boards")
@RequestConverter(BoardPostRequestConverter.class)
public HttpResponse createBoard(Board board) {
  boards.put(board.getId(), board);
  return HttpResponse.ofJson(board);
}
이제 모든 준비가 끝났으니, create 테스트를 진행 해 보도록 하겠습니다.
POSTMAN을 통해 요청을 보낼건데요, 혹시 설치가 되어 있지 않다면 curl을 통해서도 보내시면 됩니다.
curl --request POST 'localhost:8080/boards' \
-H 'Content-Type: application/json' \
-d '{"title":"My first blog", "content":"Hello Armeria!"}'
앗.. 400 에러가 발생했습니다. 에러 내용을 확인 해 보면
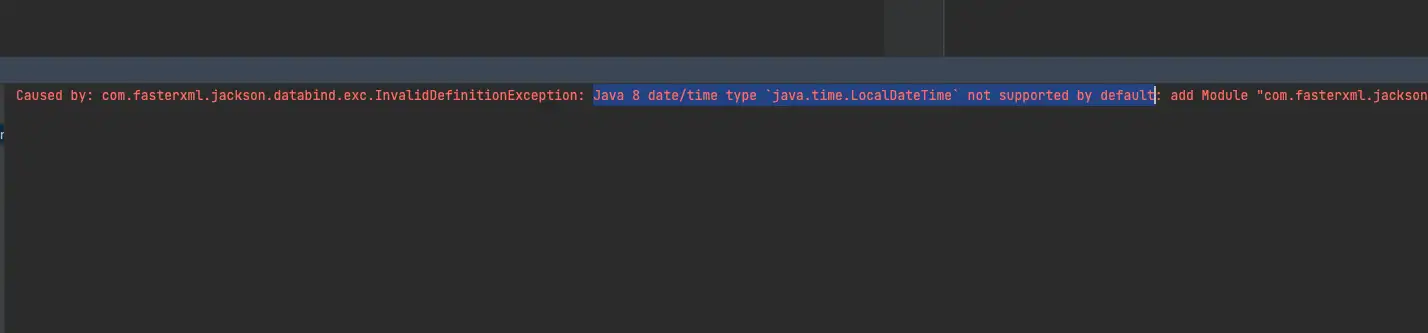
Caused by: com.fasterxml.jackson.databind.exc.InvalidDefinitionException: Java 8 date/time type
java.time.LocalDateTimenot supported by default: add Module "com.fasterxml.jackson.datatype:jackson-datatype-jsr310" to enable handling (through reference chain: com.tistory.shanepark.domain.Board["createdAt"])
jackson이 LocalDateTime의 직렬화를 기본적으로 지원 해 주지 않기 때문에 문제가 발생했네요. 이때는 해당 타입에 대한 직렬화/ 역직렬화를 커스터마이징 할 수도 있지만 jackson-datatype-jsr310 모듈을 추가 하면 간단하게 해결 할 수 있습니다.
build.gradle 에 아래의 내용을 추가 해 줍니다.
implementation 'com.fasterxml.jackson.datatype:jackson-datatype-jsr310:2.13.3'
이후 다시 서버를 실행 해서 같은 요청을 보내 보면..
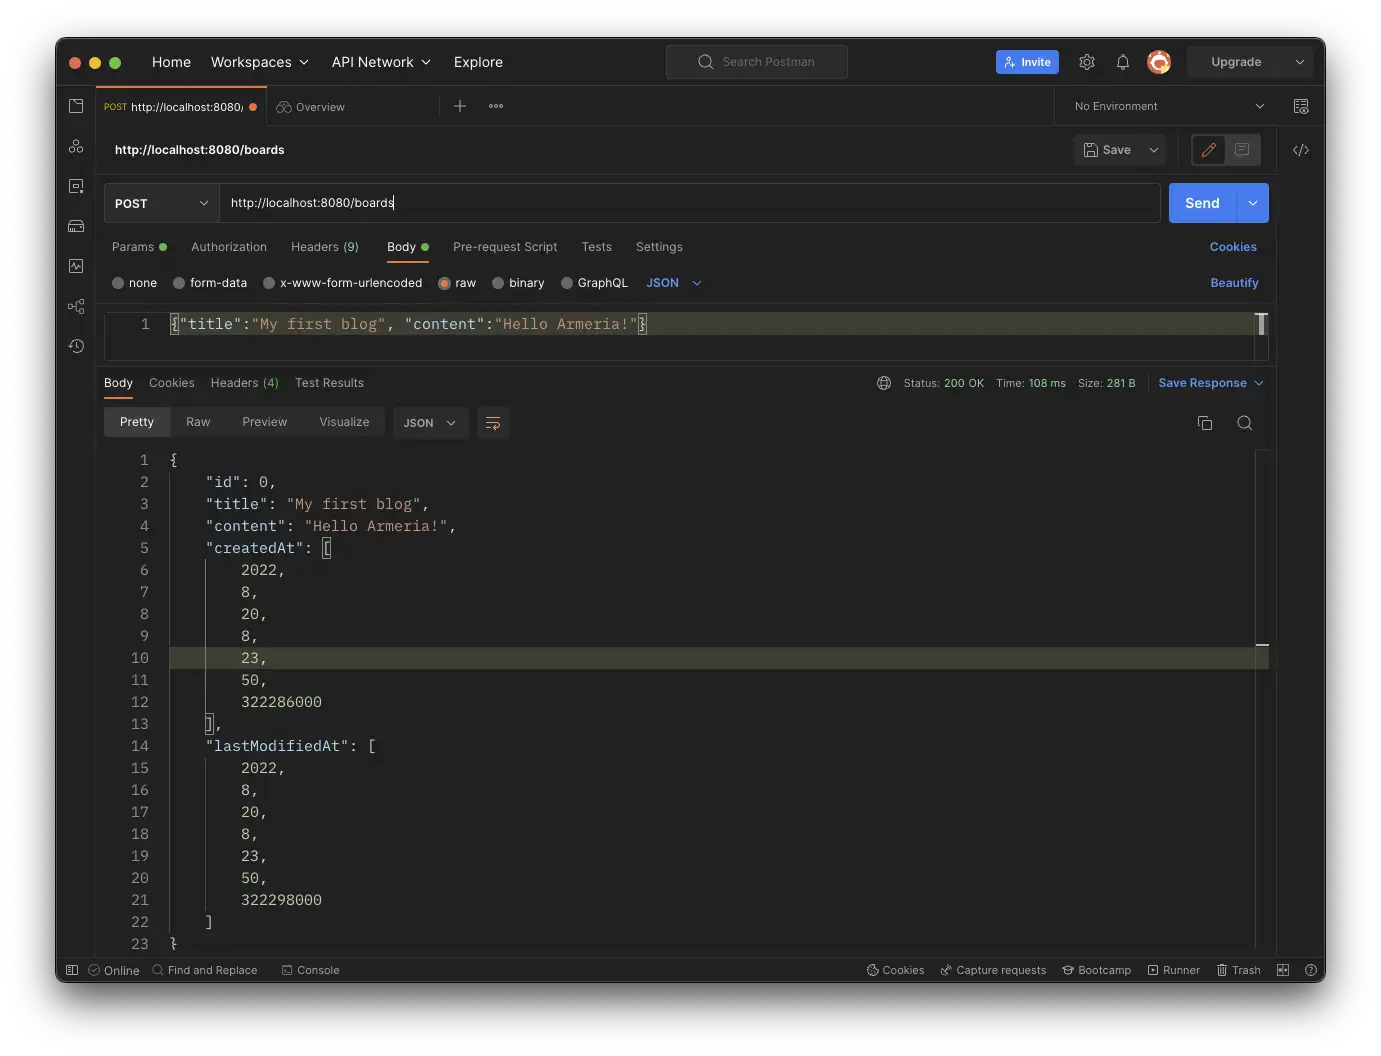
정상적으로 응답을 보내줍니다!
public class Board {
  private Long id;
  private String title;
  private String content;
  @JsonFormat(pattern = "yyyy-MM-dd HH:mm:ss")
  private LocalDateTime createdAt;
  @JsonFormat(pattern = "yyyy-MM-dd HH:mm:ss")
  private LocalDateTime lastModifiedAt;
}
JSON format이 썩 마음에 들지 않아 어노테이션을 하나 달아주었습니다.
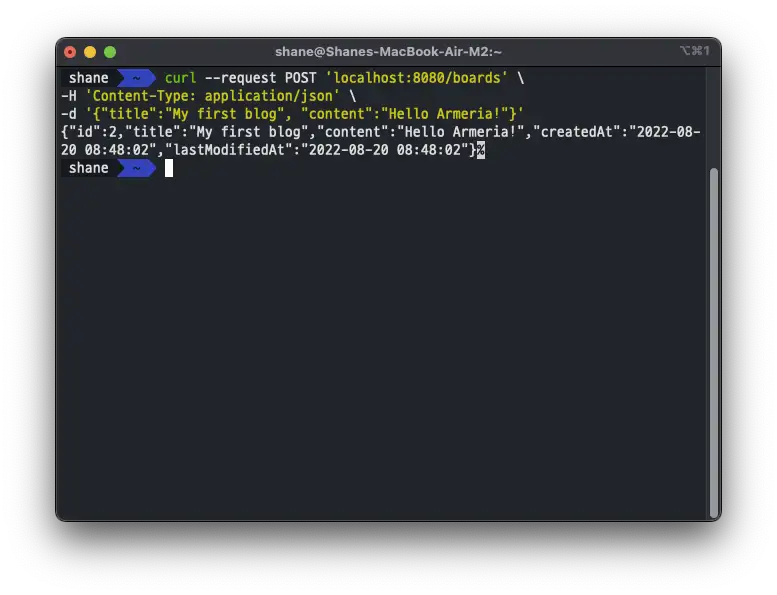
의도한 포맷으로 응답을 받았습니다.
6. READ 구현
구현
이번에는 GET 메서드에 해당하는 CRUD 를 구현 해 볼 차례 입니다.
@Get("/boards")
public void getBoard(long id) {
    ...
}
원래는 이런 형태가 되겠죠? 하지만 RESTful 한 설계를 위해 pathvariable을 사용할거에요.
pathvariable의 사용법이 스프링에서 익숙하게 사용해왔던 것과는 조금 달라요
@Get("/boards/:id")
public HttpResponse getBoard(@Param long id) {
  Board board = boards.get(id);
  return HttpResponse.ofJson(board);
}
이런 형태가 됩니다.
내친김에 single result 뿐만 아니라 findAll도 바로 구현하도록 합니다.
@Get("/boards")
public List<Board> getBoards(@Param @Default("true") boolean descOrder) {
  if (descOrder) {
    return boards.entrySet().stream()
      .sorted(Collections.reverseOrder(Comparator.comparingLong(Map.Entry::getKey)))
      .map(Map.Entry::getValue)
      .collect(Collectors.toList());
  }
  return boards.values().stream().collect(Collectors.toList());
}
테스트
이제 잘 작동하는지 확인 해 보려고 하는데, 빌드가 되지 않습니다.
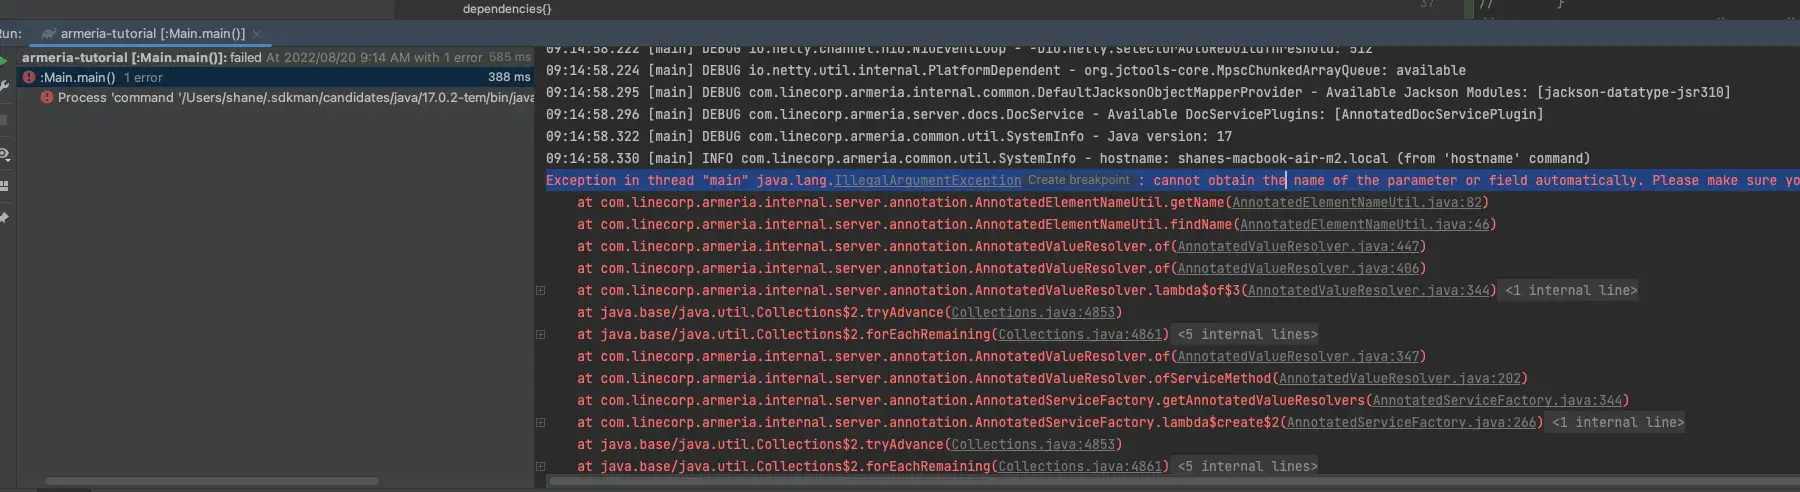
Exception in thread "main" java.lang.IllegalArgumentException: cannot obtain the name of the parameter or field automatically. Please make sure you compiled your code with '-parameters' option. If not, you need to specify parameter and header names with @Param and @Header.
파라미터나 헤더 이름을 명시하거나 혹은 -parameters 옵션으로 컴파일 해야 한다고 하네요.
@Get("/boards/:id")
public HttpResponse getBoard(@Param("id") long id) {
  Board board = boards.get(id);
  return HttpResponse.ofJson(board);
}
위에 보이는 것 처럼 파라미터 이름을 명시해주는 방법이 있긴 한데요. 이렇게 변경하면 잘 작동합니다.
그렇지만 저희는 -parameters옵션을 이용 해 보도록 하겠습니다. 사실 처음에 -parameters에 대한 내용을 봤던게 기억이 나서 Prerequisites 쪽을 다시 확인 해 보니
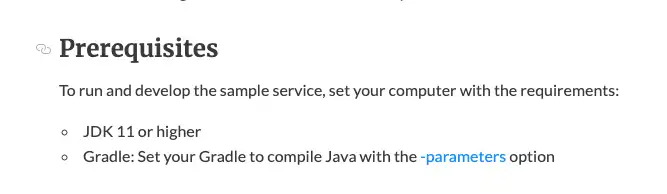
여기에도 제일 먼저 명시가 되어 있었습니다.
build.gradle 에 아래의 내용을 추가 해 주고 다시 실행 해 줍니다.
tasks.withType(JavaCompile) {
  options.compilerArgs += '-parameters'
}
이제 다시 테스트 해 보겠습니다.
조회를 하기 전에는 당연히 먼저 데이터를 추가 해 줘야겠죠?
curl --request POST 'localhost:8080/boards' \
-H 'Content-Type: application/json' \
-d '{"title":"My board no 0", "content":"Hello Armeria!"}'
curl --request POST 'localhost:8080/boards' \
-H 'Content-Type: application/json' \
-d '{"title":"My board no 1", "content":"Hello Tutorial!"}'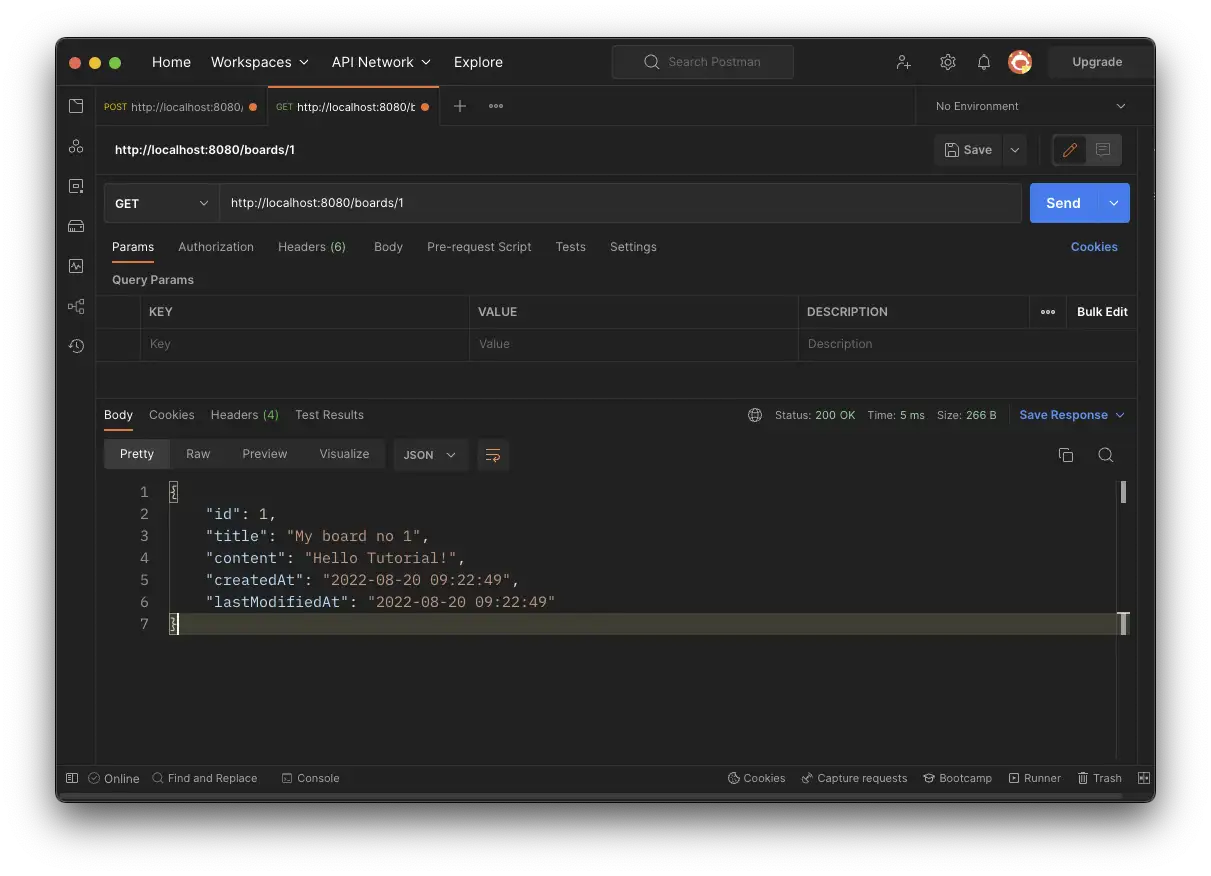
조회가 잘 됩니다.
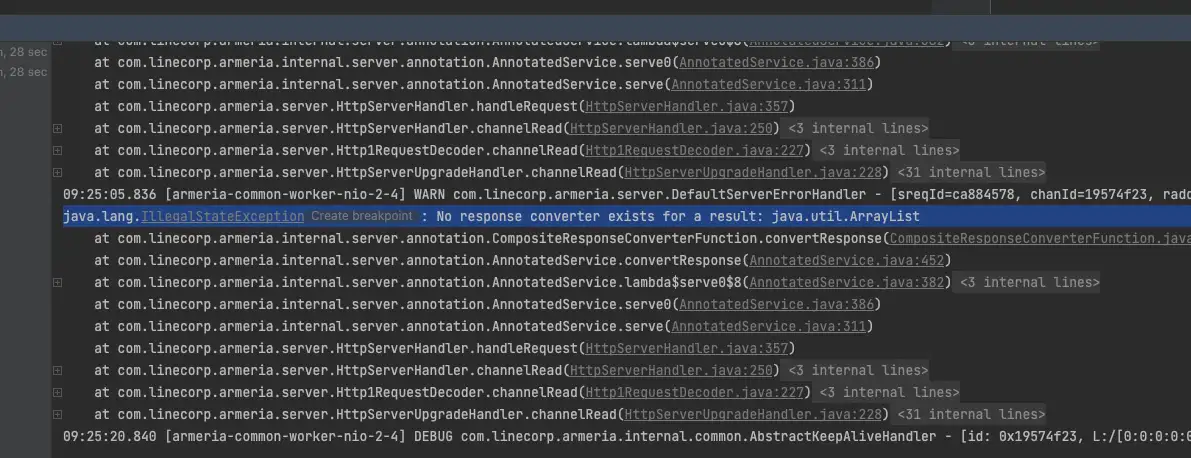
java.lang.IllegalStateException: No response converter exists for a result: java.util.ArrayList
다만 전체 조회는 ArrayList에 대한 컨버터가 없다는 에러가 발생 하고 있습니다.
객체들의 리스트를 JSON 응답으로 변경하기 위해서는 특별한 어노테이션이 하나 더 필요합니다.
@ProducesJson 어노테이션을 붙이고 한번 더 테스트를 진행 해 봅니다.
@Get("/boards")
@ProducesJson
public List<Board> getBoards(@Param @Default("true") boolean descOrder) {
  if (descOrder) {
    return boards.entrySet().stream()
      .sorted(Collections.reverseOrder(Comparator.comparingLong(Map.Entry::getKey)))
      .map(Map.Entry::getValue)
      .collect(Collectors.toList());
  }
  return boards.values().stream().collect(Collectors.toList());
}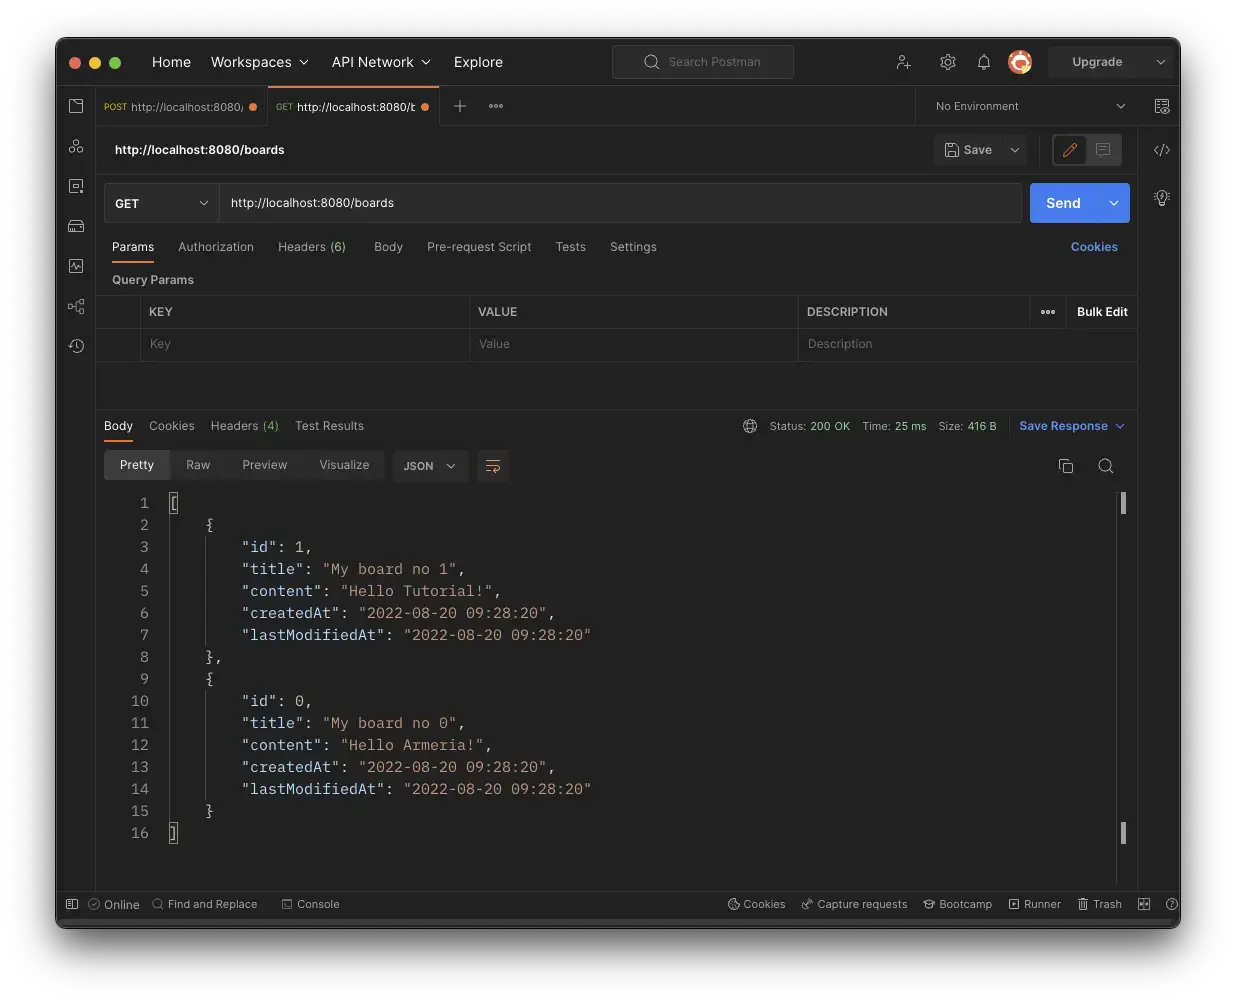
정상적으로 응답을 해냅니다!
7. UPDATE 구현
구현
이제 CRUD의 세번째 작업 입니다. 항상 CRUD를 만들 때마다 뒤로 갈수록 간단해져서 마음이 편해져요.
이번에도 과연 기대를 저버리지 않을까요?
@Put("/boards/:id")
public HttpResponse updateBoard(@Param long id, @RequestObject Board board) {
    ...
}
계속 해 온 것 처럼 서비스 코드를 작성 해 줍니다.
여기서 일단 첫번째로 주목해야할건 전에 본 적 없는 @com.linecorp.armeria.server.annotation.RequestObject 어노테이션 인데요 request body를 자바 오브젝트로 변환해 주기 위해 필요해요.
그리고 변환을 위해서 생성자에 @JsonCreator 도 추가되어야 하는데요, 업데이트에 쓰기 위한 생성자도 하나 함께 추가 해 주었습니다. JsonCreator 어노테이션에 대한 더 자세한 정보는 아래의 링크를 참고해주세요.
Board.java
@JsonCreator
public Board(@JsonProperty("id") Long id, @JsonProperty("title") String title, @JsonProperty("content") String content) {
  this(id, title, content, LocalDateTime.now(), LocalDateTime.now());
}

public Board(Long id, String title, String content, LocalDateTime createdAt, LocalDateTime lastModifiedAt) {
  this.id = id;
  this.title = title;
  this.content = content;
  this.createdAt = createdAt;
  this.lastModifiedAt = lastModifiedAt;
}
이제 서비스 코드를 마저 구현 해 줍니다.
@Put("/boards/:id")
public HttpResponse updateBoard(@Param long id, @RequestObject Board board) {
  Board oldBoard = boards.get(id);
  if (oldBoard == null) {
    return HttpResponse.of(HttpStatus.NOT_FOUND);
  }
  Board newBoard = new Board(id, board.getTitle(), board.getContent(), oldBoard.getCreatedAt(), board.getCreatedAt());
  boards.put(id, newBoard);
  return HttpResponse.ofJson(newBoard);
}
만약 id로 조회한 정보가 없으면 404 응답을 보내고, 있다면 수정 한 뒤에 새로 생성한 정보를 반환할거에요.
테스트
일단 수정에 앞서 데이터를 추가 해 줍니다.
curl --request POST 'localhost:8080/boards' \
-H 'Content-Type: application/json' \
-d '{"title":"My board no 0", "content":"Hello Armeria!"}'
curl --request POST 'localhost:8080/boards' \
-H 'Content-Type: application/json' \
-d '{"title":"My board no 1", "content":"Hello Tutorial!"}'
이제 PUT 명령으로 수정을 요청할거에요.
curl --request PUT 'localhost:8080/boards/0' \
-H 'Content-Type: application/json' \
-d '{
    "title": "Updated title",
    "content": "Updated content."
}'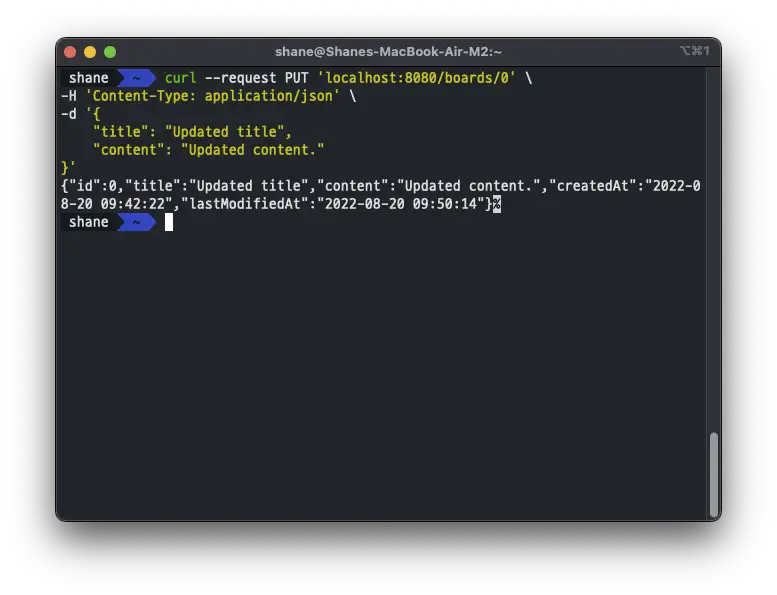
결과
수정이 잘 이루어진 것 같네요. 전체 조회를 한번 해보겠습니다.
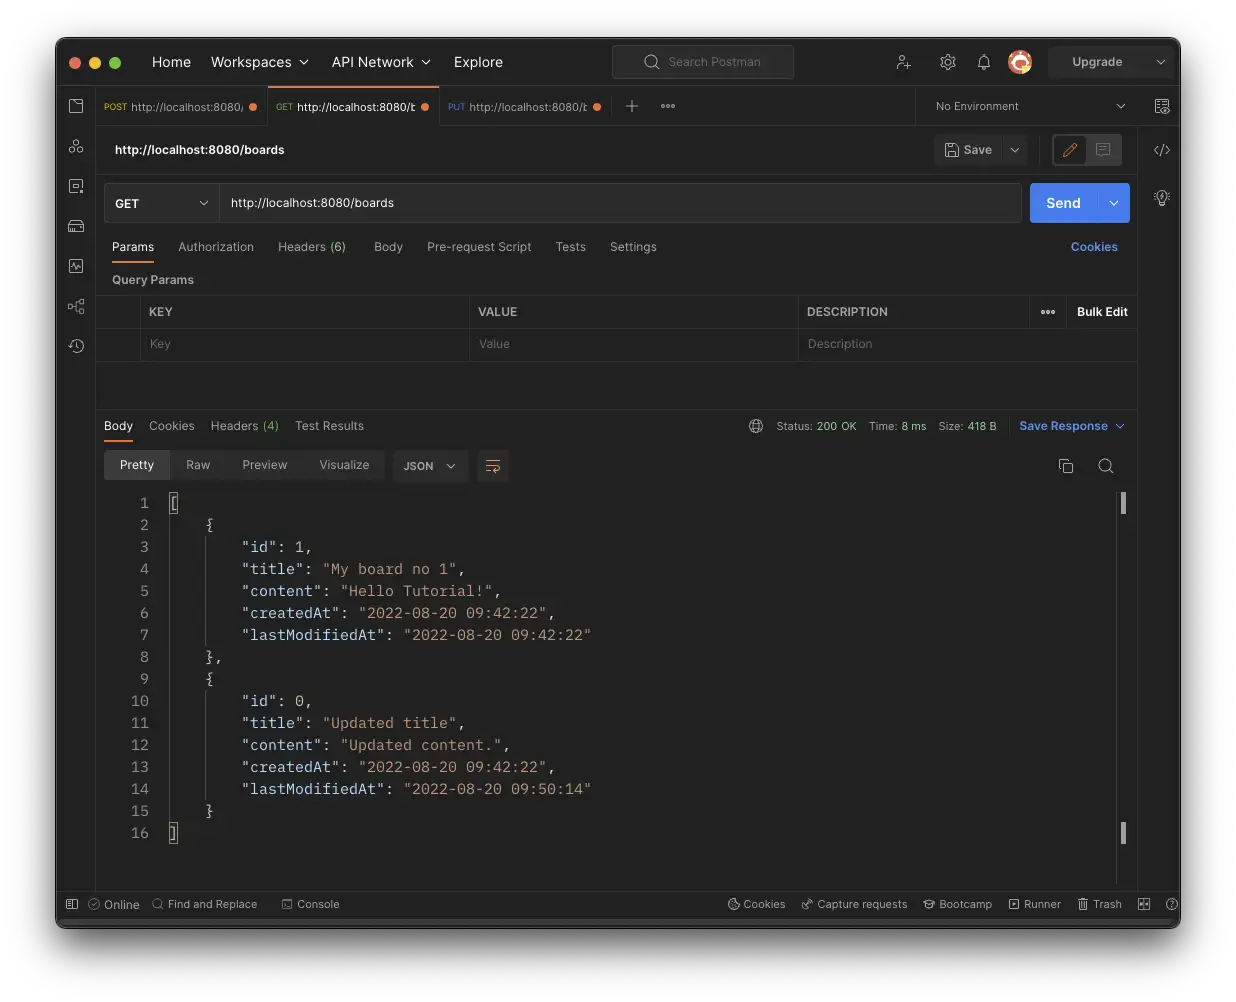
id 0번의 정보가 잘 변경 되었네요!
8. DELETE 구현
이제 CRUD의 마지막 단계인 삭제만이 남아 있습니다.
이번 스텝에서는 삭제, 예외 처리, 블러킹 추가 순서로 진행하게 됩니다.
삭제
@Delete("/boards/:id")
public void deleteBoard(@Param long id) {
  Board removed = boards.remove(id);
}
삭제는 정말 간단한데요. CRUD 의 마지막에 D가 있어서 모두가 행복한 것 같아요.
예외처리
수정때와 마찬가지로 예외를 처리하는 코드를 추가 해 준다면
@Delete("/boards/:id")
public void deleteBoard(@Param long id) {
  Board removed = boards.remove(id);
  if (removed == null) {
    throw new IllegalArgumentException("The board not exist. id: " + id);
  }
}
찾지 못했을 경우에 예외를 던지게 되겠네요.
예외를 처리하는 핸들러도 등록 해 보겠습니다.
public class BadRequestExceptionHandler implements ExceptionHandlerFunction {
    private static final ObjectMapper mapper = new ObjectMapper();

    @Override
    public HttpResponse handleException(ServiceRequestContext ctx, HttpRequest req, Throwable cause) {
        if (cause instanceof IllegalArgumentException) {
            String message = cause.getMessage();
            ObjectNode objectNode = mapper.createObjectNode();
            objectNode.put("error", message);
            return HttpResponse.ofJson(HttpStatus.BAD_REQUEST, objectNode);
        }
        return ExceptionHandlerFunction.fallthrough();
    }
}ExceptionHandlerFunction을 구현 한 BadRequestExceptionHandler 클래스를 파일을 생성 하고
@Delete("/boards/:id")
@ExceptionHandler(BadRequestExceptionHandler.class)
public void deleteBoard(@Param long id) {
  ...
}
서비스에 어노테이션으로 핸들러를 추가 해 줍니다.
블러킹
실제 서비스에서는 데이터베이스에 접근하는데 시간이 걸리는데요, 이벤트 루프가 블럭되지 않도록 blocking task excutor에 blocking task들을 전달 해야 합니다.
구현을 위한 몇가지 방법이 있지만, @Blocking 어노테이션으로 간단하게 처리가 가능합니다.
그렇게해서 완성된 코드는 아래와 같습니다.
    @Blocking
    @Delete("/boards/:id")
    @ExceptionHandler(BadRequestExceptionHandler.class)
    public HttpResponse deleteBoard(@Param long id) {
        Board removed = boards.remove(id);
        if (removed == null) {
            throw new IllegalArgumentException("The board not exist. id: " + id);
        }
        return HttpResponse.of(HttpStatus.NO_CONTENT);
    }
이제 테스트를 진행 해 보아야겠죠?
지금까지와 마찬가지로 데이터를 먼저 등록 해 준 후에
curl --request POST 'localhost:8080/boards' \
-H 'Content-Type: application/json' \
-d '{"title":"My board no 0", "content":"Hello Armeria!"}'
curl --request POST 'localhost:8080/boards' \
-H 'Content-Type: application/json' \
-d '{"title":"My board no 1", "content":"Hello Tutorial!"}'
0번 데이터를 삭제 해 보겠습니다.
curl --request DELETE 'localhost:8080/boards/0'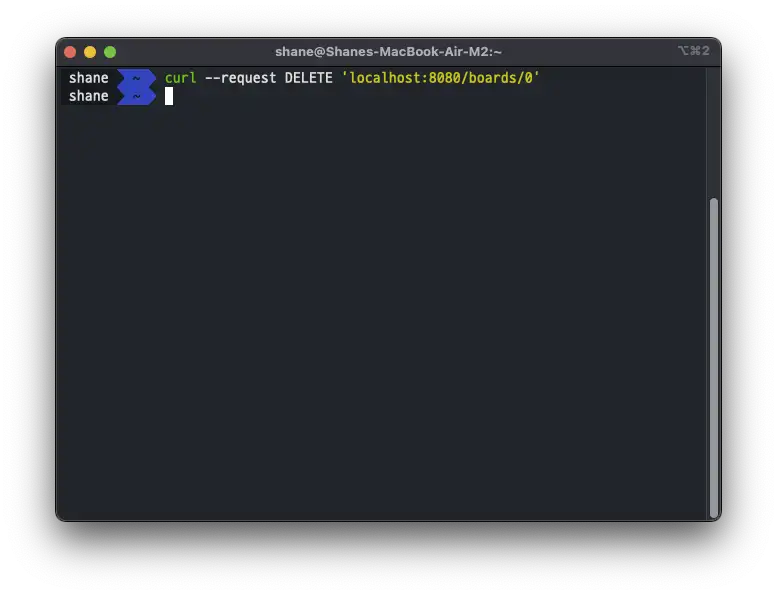
서비스가 아무것도 리턴하지 않기 떄문에 특별히 응답이 보이지는 않습니다.
하지만 조회를 해 본다면
curl --request GET 'localhost:8080/boards'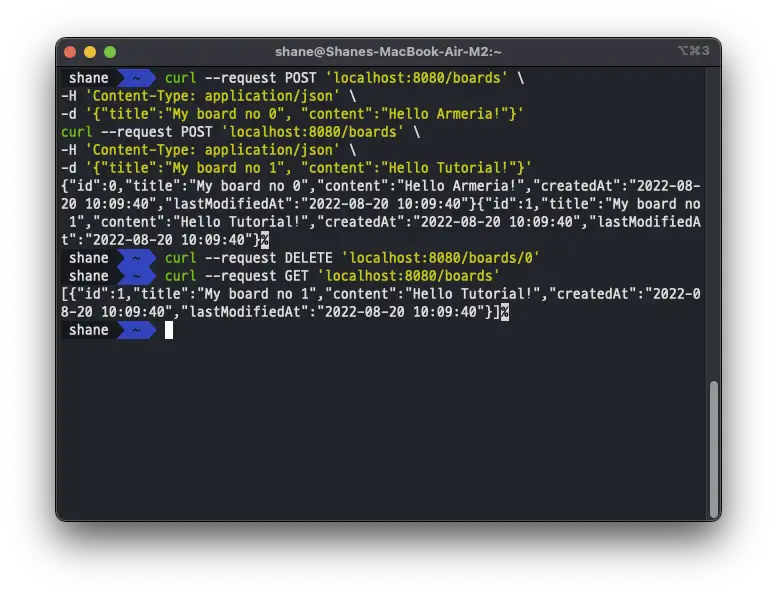
0번 데이터가 삭제되어 1번 데이터만 남아있는것이 확인 됩니다.
마치며
지금까지 Armeria 를 이용한 CRUD 를 작성 해 보았습니다.
더 적은 수의 스레드와 하드웨어 리소스로 동시성을 처리 하기 위해서는 Reactive 프로그래밍이 절실한데요, 아쉽게도 기존의 스프링 MVC는 Async Non-Blocking 에 대한 지원이 미비합니다. Servlet 3.1 스펙에서 논블로킹 I/O를 위한 API가 추가되었음에도 기존 Servlet API의 동기식(Filter,Servlet) 및 Blocking(getParameter, getPart) 등의 레거시로 인해 한계가 있는 상태입니다.
Reactive Streams은 JVM 기반에서 Async Non-Blocking 처리를 위한 스펙을 명 한 것 인데요, Spring WebFlux의 Project Reactor와 Armeria 는 해당 스펙을 구현 했습니다.
사실 제가 아직 그래서 비동기와 논블럭킹이 뭔데? 에 대한 대답을 찾아나가는 과정중에 있다 보니 Armeria가 어떤식으로 비동기 서버를 만들어냈는지 혹은 비동기와 논블럭킹에 대한 내용을 담아 내지는 못했습니다.
다만 영문으로 된 튜토리얼에 막연한 두려움이 있던 분들이나 Armeria 에 대해 궁금했던 분들에게 조금이나마 도움이 되었으면 하며, 머지 않은 기간 내에 아직 담아내지 못했던 내용들도 추가 해낼 수 있도록 노력하겠습니다. 감사합니다.
references
'Programming > Java' 카테고리의 다른 글
| [Java] 불변객체(Immutable Object)의 JSON 직렬화 및 역직렬화 (0) | 2022.11.20 |
|---|---|
| [Java] Stream을 활용해 중첩 컬렉션 및 Tree 평면화하기 (0) | 2022.11.07 |
| [Java] Optional 올바르게 사용하기 (0) | 2022.07.21 |
| [Java] switch 문이 if-else 보다 효율적인 이유 (0) | 2022.07.09 |
| [JAVA] zxing 활용해 QR코드 생성하기 (0) | 2022.06.30 |