Intro
스프링부트와 JPA로 프로젝트를 진행하다 보면 실제 쿼리가 어떻게 나갈지 눈으로 확인을 하고 싶을 때가 참 많습니다. JPA가 참 편하긴 한데 개발자가 직접 쿼리를 작성하지 않았다 보니 실제로 어떤 쿼리가 나갈지는 눈으로 확인 하기 전까지는 정확히 알기 힘들고, 가끔씩은 의외의 쿼리가 나가는걸 보고 놀라기도 합니다.
제 기준에 쿼리를 꼭 확인해야 할 상황이 크게 두가지 정도가 있었는데요
- 의도한대로 작동하지 않아서 쿼리가 의심될 때
- N+1 문제가 발생하고 있는지 확인이 필요할 때
그러다보니 항상 테스트 설정에서는 쿼리가 전부 출력되게 설정 해두고 테스트 코드들을 실행 시키고 있습니다. 확실히 쿼리가 눈으로 확인이 되면 마음의 안정이 좀 오는 것 같아요.
쿼리 로그를 확인하는 방법을 단계별로 개선 해 가며 알아보도록 하겠습니다. 급하신 분들은 쭉 내려서 P6Spy를 바로 보셔도 되지만 그래도 단계별로 확인을 하시는걸 권장 합니다.
show_sql 설정
일단 간단한 설정으로 JPA에서 쿼리가 어떻게 나가는지 로그로 확인을 할 수 있습니다. 운영환경에서는 로그가 감당이 안되기 때문에 개발환경이나 테스트 환경에서만 설정을 하는게 좋겠습니다.
application.yaml
spring:
  jpa:
      show_sql: true
혹은 properties 파일을 사용한다면 아래와 같습니다.
application.properties
spring.jpa.show-sql=true이렇게만 설정 해 주면 아주 간단하게 로그를 확인 하실 수 있습니다.
다만 이렇게 하면 보이는 것 처럼 몇가지 단점이 있는데요
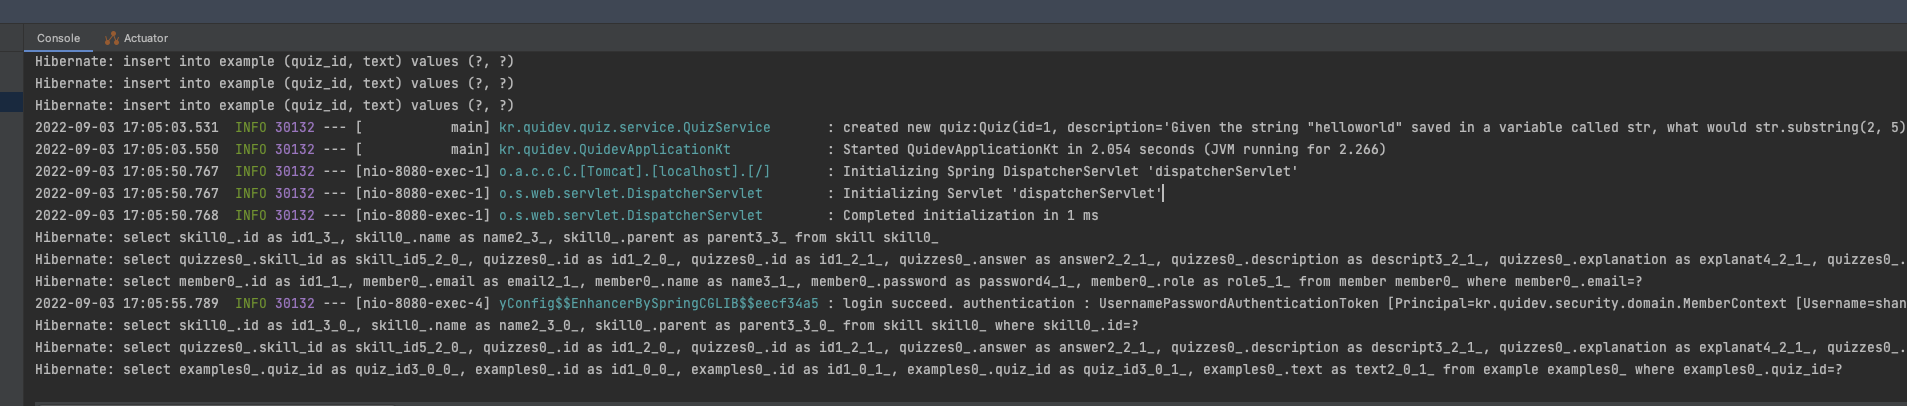
일단 로그에 쿼리가 어떻게 찍혔는지 보면서 확인 해 보겠습니다.
select quizzes0_.skill_id as skill_id5_2_0_, quizzes0_.id as id1_2_0_, quizzes0_.id as id1_2_1_, quizzes0_.answer as answer2_2_1_, quizzes0_.description as descript3_2_1_, quizzes0_.explanation as explanat4_2_1_, quizzes0_.skill_id as skill_id5_2_1_ from quiz quizzes0_ where quizzes0_.skill_id=?
쿼리가 눈에 보이기는 정렬이 되어 있지 않아 정신도 없고, 파라미터도 보이지 않습니다.
이번에는 format_sql 옵션을 추가 해 보겠습니다.
application.yaml
spring:
  jpa:
    show-sql: true
    properties:
      hibernate:
        format_sql: true
application.properties
spring.jpa.properties.hibernate.format_sql=true이후 로그를 확인 해 보면
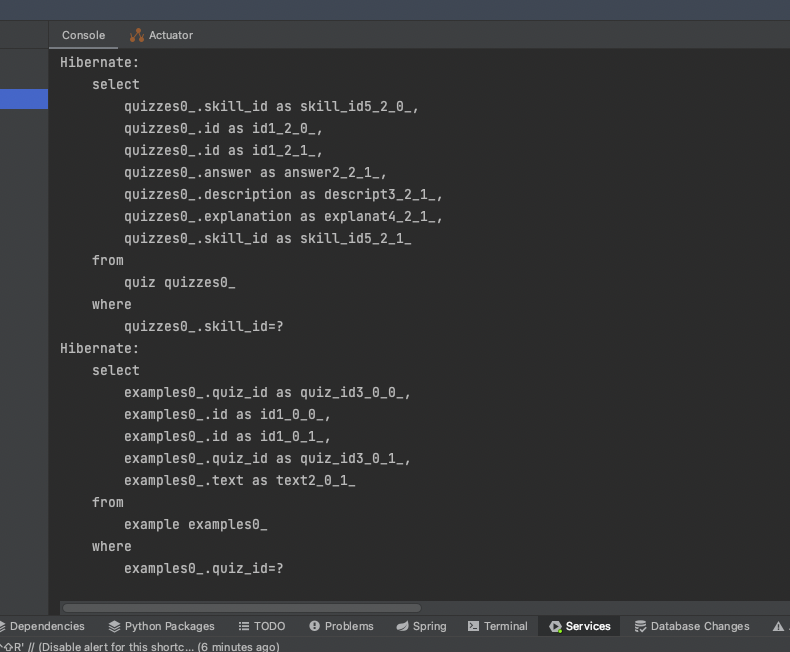
쿼리가 정렬되어서 무엇을 하는 쿼리인지 한눈에 알아볼 수 있게 되었습니다.
다만 여전히 파라미터는 보이지 않는 문제가 있습니다.
Logger를 통해 파라미터 확인하기
그래서 이번에는 파라미터를 확인 해 보려고 합니다.
application.yaml
logging:
  level:
    org.hibernate.type.descriptor.sql.BasicBinder: trace
application.properties
logging.level.org.hibernate.type.descriptor.sql.BasicBinder=TRACE해당 설정을 추가 하면, prepared statement의 파라미터를 로그로 남기게 되는데요. 이번에는 어떻게 로그가 남는지 확인 해 보겠습니다.
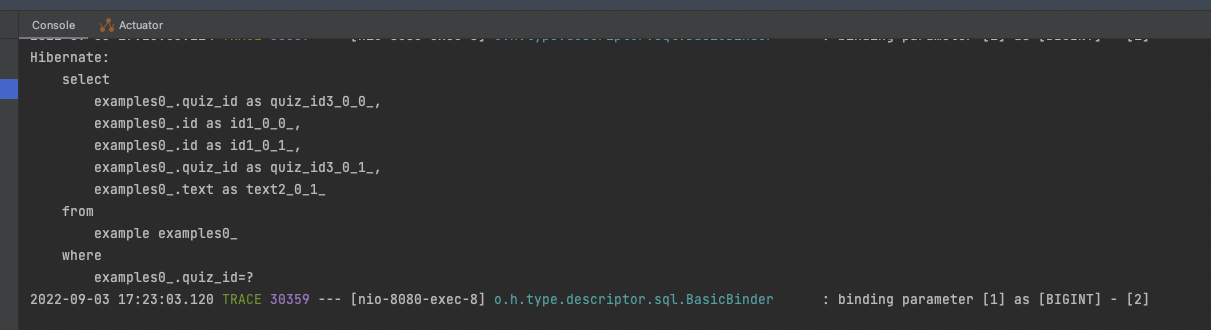
쿼리도 이쁘게 나오고, 파라미터도 binding parameter [1] as [BIGINT] - [2] 라고, 첫번째 파라미터는 BIGINT 타입의 값 2 가 들어갔다고 확인이 됩니다.
사실 이정도면 확인하기엔 훌륭하긴 하지만 ? 대신에 그 자리에 파라미터가 직접 들어가지 않은 아쉬움이 남습니다.
P6Spy로 쿼리 로그 출력하기
위에서 겪은 모든 문제를 해결 하기 위해 p6spy가 등장했습니다.
P6Spy는 기존 어플리케이션에서 코드를 변경하지 않고도 데이터베이스의 데이터를 자연스럽게 가로채고, 로그도 남기게 해주는 프레임워크 입니다.
실제 사용자의 DataSource를 P6SpyDataSource 가 감싸고, jdbc 요청이 발생 할 때마다 p6spy가 프록시로 래핑해서 해당 정보를 분석 하고, 로그를 남기는 원리로 작동 합니다.
P6Spy를 도입하는 방법은 몇 가지가 있는데요
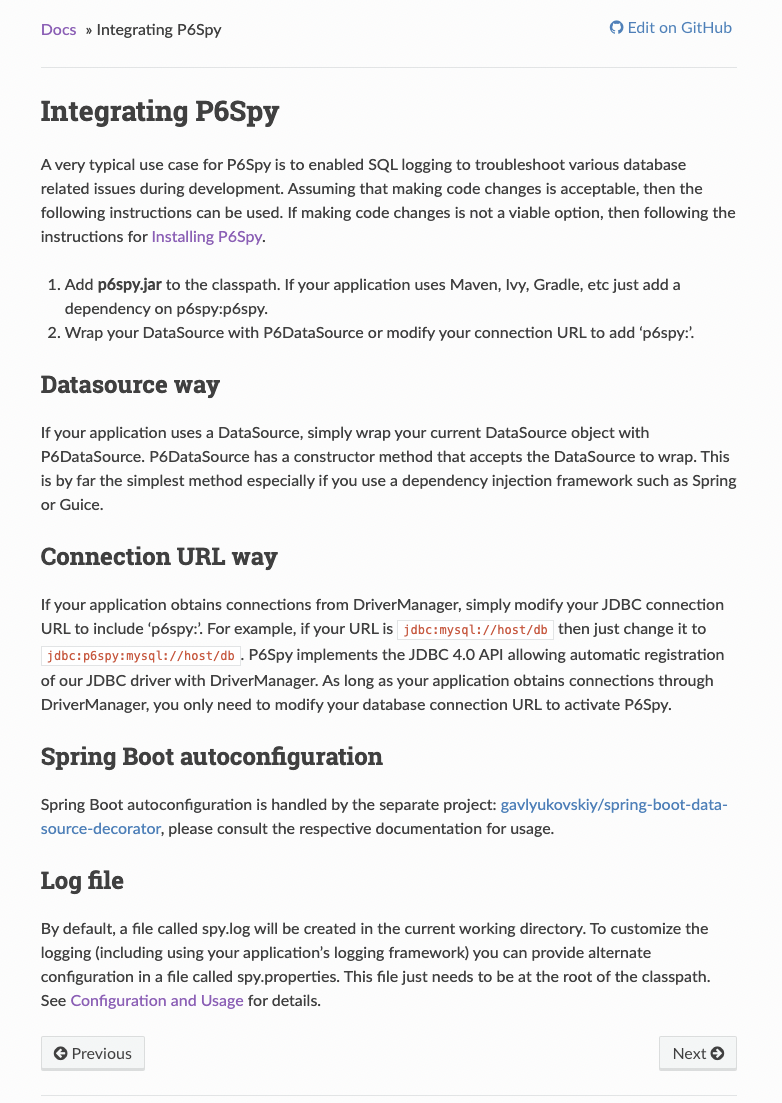
- Datasource를 P6DataSource로 대체하는 방법
- URL 방식으로 p6spy를 거치도록 변경하는 방법
- Spring Boot 자동 설정을 하는 방법
당연히 스프링부트 스타터를 활용해서 자동 설정을 하는게 가장 쉽고 간단하지만, Datasource 방식을 먼저 알아 보고, 이어서 스프링부트 설정 방법으로 넘어가도록 하겠습니다.
Datasource
일단 P6spy 의존성을 추가 해 줍니다.
저는 kotlin script로 되어 있는데, maven, gradle에 맞게 p6spy 의존성을 추가 해 주세요.
build.gradle.kts
implementation("p6spy:p6spy:3.9.1")일단 기존의 datasource 설정 입니다.
변경 전
application.yaml
spring:
  datasource:
    url: jdbc:postgresql://localhost:5432/quidev
    username: shane
    password: shane
이걸 아래와 같이 변경 해 줍니다.
변경 후
application.yaml
spring:
  datasource:
    driver-class-name: com.p6spy.engine.spy.P6SpyDriver
    url: jdbc:p6spy:postgresql://localhost:5432/quidev
    username: shane
    password: shane
그리고, 위에서 추가했던 show-sql 이나 format_sql 을 모두 지워주고 p6spy 로깅을 추가 해 줍니다.
application.yaml
logging:
  level:
    p6spy: info
그리고 이제 spy.properties 파일을 /src/main/resources 경로에 생성 해 줍니다.
튜토리얼에 작성된 전체 P6Spy 옵션 파일은 아래와 같습니다.
이중 필요한 설정만 찾아서 해 주면 됩니다.
#################################################################
# P6Spy Options File                                            #
# See documentation for detailed instructions                   #
# http://p6spy.github.io/p6spy/2.0/configandusage.html          #
#################################################################

#################################################################
# MODULES                                                       #
#                                                               #
# Module list adapts the modular functionality of P6Spy.        #
# Only modules listed are active.                               #
# (default is com.p6spy.engine.logging.P6LogFactory and         #
# com.p6spy.engine.spy.P6SpyFactory)                            #
# Please note that the core module (P6SpyFactory) can't be      #
# deactivated.                                                  #
# Unlike the other properties, activation of the changes on     #
# this one requires reload.                                     #
#################################################################
#modulelist=com.p6spy.engine.spy.P6SpyFactory,com.p6spy.engine.logging.P6LogFactory,com.p6spy.engine.outage.P6OutageFactory

################################################################
# CORE (P6SPY) PROPERTIES                                      #
################################################################

# A comma separated list of JDBC drivers to load and register.
# (default is empty)
#
# Note: This is normally only needed when using P6Spy in an
# application server environment with a JNDI data source or when
# using a JDBC driver that does not implement the JDBC 4.0 API
# (specifically automatic registration).
#driverlist=

# for flushing per statement
# (default is false)
#autoflush=false

# sets the date format using Java's SimpleDateFormat routine.
# In case property is not set, milliseconds since 1.1.1970 (unix time) is used (default is empty)
#dateformat=

# prints a stack trace for every statement logged
#stacktrace=false
# if stacktrace=true, specifies the stack trace to print
#stacktraceclass=

# determines if property file should be reloaded
# Please note: reload means forgetting all the previously set
# settings (even those set during runtime - via JMX)
# and starting with the clean table
# (default is false)
#reloadproperties=false

# determines how often should be reloaded in seconds
# (default is 60)
#reloadpropertiesinterval=60

# specifies the appender to use for logging
# Please note: reload means forgetting all the previously set
# settings (even those set during runtime - via JMX)
# and starting with the clean table
# (only the properties read from the configuration file)
# (default is com.p6spy.engine.spy.appender.FileLogger)
#appender=com.p6spy.engine.spy.appender.Slf4JLogger
#appender=com.p6spy.engine.spy.appender.StdoutLogger
#appender=com.p6spy.engine.spy.appender.FileLogger

# name of logfile to use, note Windows users should make sure to use forward slashes in their pathname (e:/test/spy.log)
# (used for com.p6spy.engine.spy.appender.FileLogger only)
# (default is spy.log)
#logfile=spy.log

# append to the p6spy log file. if this is set to false the
# log file is truncated every time. (file logger only)
# (default is true)
#append=true

# class to use for formatting log messages (default is: com.p6spy.engine.spy.appender.SingleLineFormat)
#logMessageFormat=com.p6spy.engine.spy.appender.SingleLineFormat

# Custom log message format used ONLY IF logMessageFormat is set to com.p6spy.engine.spy.appender.CustomLineFormat
# default is %(currentTime)|%(executionTime)|%(category)|connection%(connectionId)|%(sqlSingleLine)
# Available placeholders are:
#   %(connectionId)            the id of the connection
#   %(currentTime)             the current time expressing in milliseconds
#   %(executionTime)           the time in milliseconds that the operation took to complete
#   %(category)                the category of the operation
#   %(effectiveSql)            the SQL statement as submitted to the driver
#   %(effectiveSqlSingleLine)  the SQL statement as submitted to the driver, with all new lines removed
#   %(sql)                     the SQL statement with all bind variables replaced with actual values
#   %(sqlSingleLine)           the SQL statement with all bind variables replaced with actual values, with all new lines removed
#customLogMessageFormat=%(currentTime)|%(executionTime)|%(category)|connection%(connectionId)|%(sqlSingleLine)

# format that is used for logging of the java.util.Date implementations (has to be compatible with java.text.SimpleDateFormat)
# (default is yyyy-MM-dd'T'HH:mm:ss.SSSZ)
#databaseDialectDateFormat=yyyy-MM-dd'T'HH:mm:ss.SSSZ

# format that is used for logging of the java.sql.Timestamp implementations (has to be compatible with java.text.SimpleDateFormat)
# (default is yyyy-MM-dd'T'HH:mm:ss.SSSZ)
#databaseDialectTimestampFormat=yyyy-MM-dd'T'HH:mm:ss.SSSZ

# format that is used for logging booleans, possible values: boolean, numeric
# (default is boolean)
#databaseDialectBooleanFormat=boolean

# Specifies the format for logging binary data. Not applicable if excludebinary is true.
# (default is com.p6spy.engine.logging.format.HexEncodedBinaryFormat)
#databaseDialectBinaryFormat=com.p6spy.engine.logging.format.PostgreSQLBinaryFormat
#databaseDialectBinaryFormat=com.p6spy.engine.logging.format.MySQLBinaryFormat
#databaseDialectBinaryFormat=com.p6spy.engine.logging.format.HexEncodedBinaryFormat

# whether to expose options via JMX or not
# (default is true)
#jmx=true

# if exposing options via jmx (see option: jmx), what should be the prefix used?
# jmx naming pattern constructed is: com.p6spy(.<jmxPrefix>)?:name=<optionsClassName>
# please note, if there is already such a name in use it would be unregistered first (the last registered wins)
# (default is none)
#jmxPrefix=

# if set to true, the execution time will be measured in nanoseconds as opposed to milliseconds
# (default is false)
#useNanoTime=false

#################################################################
# DataSource replacement                                        #
#                                                               #
# Replace the real DataSource class in your application server  #
# configuration with the name com.p6spy.engine.spy.P6DataSource #
# (that provides also connection pooling and xa support).       #
# then add the JNDI name and class name of the real             #
# DataSource here                                               #
#                                                               #
# Values set in this item cannot be reloaded using the          #
# reloadproperties variable. Once it is loaded, it remains      #
# in memory until the application is restarted.                 #
#                                                               #
#################################################################
#realdatasource=/RealMySqlDS
#realdatasourceclass=com.mysql.jdbc.jdbc2.optional.MysqlDataSource

#################################################################
# DataSource properties                                         #
#                                                               #
# If you are using the DataSource support to intercept calls    #
# to a DataSource that requires properties for proper setup,    #
# define those properties here. Use name value pairs, separate  #
# the name and value with a semicolon, and separate the         #
# pairs with commas.                                            #
#                                                               #
# The example shown here is for mysql                           #
#                                                               #
#################################################################
#realdatasourceproperties=port;3306,serverName;myhost,databaseName;jbossdb,foo;bar

#################################################################
# JNDI DataSource lookup                                        #
#                                                               #
# If you are using the DataSource support outside of an app     #
# server, you will probably need to define the JNDI Context     #
# environment.                                                  #
#                                                               #
# If the P6Spy code will be executing inside an app server then #
# do not use these properties, and the DataSource lookup will   #
# use the naming context defined by the app server.             #
#                                                               #
# The two standard elements of the naming environment are       #
# jndicontextfactory and jndicontextproviderurl. If you need    #
# additional elements, use the jndicontextcustom property.      #
# You can define multiple properties in jndicontextcustom,      #
# in name value pairs. Separate the name and value with a       #
# semicolon, and separate the pairs with commas.                #
#                                                               #
# The example shown here is for a standalone program running on #
# a machine that is also running JBoss, so the JNDI context     #
# is configured for JBoss (3.0.4).                              #
#                                                               #
# (by default all these are empty)                              #
#################################################################
#jndicontextfactory=org.jnp.interfaces.NamingContextFactory
#jndicontextproviderurl=localhost:1099
#jndicontextcustom=java.naming.factory.url.pkgs;org.jboss.naming:org.jnp.interfaces

#jndicontextfactory=com.ibm.websphere.naming.WsnInitialContextFactory
#jndicontextproviderurl=iiop://localhost:900

################################################################
# P6 LOGGING SPECIFIC PROPERTIES                               #
################################################################

# filter what is logged
# please note this is a precondition for usage of: include/exclude/sqlexpression
# (default is false)
#filter=false

# comma separated list of strings to include
# please note that special characters escaping (used in java) has to be done for the provided regular expression
# (default is empty)
#include=
# comma separated list of strings to exclude
# (default is empty)
#exclude=

# sql expression to evaluate if using regex
# please note that special characters escaping (used in java) has to be done for the provided regular expression
# (default is empty)
#sqlexpression=

#list of categories to exclude: error, info, batch, debug, statement,
#commit, rollback, result and resultset are valid values
# (default is info,debug,result,resultset,batch)
#excludecategories=info,debug,result,resultset,batch

#whether the binary values (passed to DB or retrieved ones) should be logged with placeholder: [binary] or not.
# (default is false)
#excludebinary=false

# Execution threshold applies to the standard logging of P6Spy.
# While the standard logging logs out every statement
# regardless of its execution time, this feature puts a time
# condition on that logging. Only statements that have taken
# longer than the time specified (in milliseconds) will be
# logged. This way it is possible to see only statements that
# have exceeded some high water mark.
# This time is reloadable.
#
# executionThreshold=integer time (milliseconds)
# (default is 0)
#executionThreshold=

################################################################
# P6 OUTAGE SPECIFIC PROPERTIES                                #
################################################################
# Outage Detection
#
# This feature detects long-running statements that may be indicative of
# a database outage problem. If this feature is turned on, it will log any
# statement that surpasses the configurable time boundary during its execution.
# When this feature is enabled, no other statements are logged except the long
# running statements. The interval property is the boundary time set in seconds.
# For example, if this is set to 2, then any statement requiring at least 2
# seconds will be logged. Note that the same statement will continue to be logged
# for as long as it executes. So if the interval is set to 2, and the query takes
# 11 seconds, it will be logged 5 times (at the 2, 4, 6, 8, 10 second intervals).
#
# outagedetection=true|false
# outagedetectioninterval=integer time (seconds)
#
# (default is false)
#outagedetection=false
# (default is 60)
#outagedetectioninterval=30
분량이 상당합니다.
설정에 대한 자세한 내용은 https://p6spy.readthedocs.io/en/latest/configandusage.html#configuration-and-usage 를 참고 해 주세요.
사실 너무 긴데, 아래의 설정 만 적용 했습니다. 기본 로깅 포맷은
%(currentTime)|%(executionTime)|%(category)|connection%(connectionId)|%(sqlSingleLine) 인데요, 정보가 쓸데없이 너무 많아 customLogMessageFormat을 적용 했습니다.
appender=com.p6spy.engine.spy.appender.Slf4JLogger
logMessageFormat=com.p6spy.engine.spy.appender.CustomLineFormat
customLogMessageFormat=| %(executionTime) ms | %(sql)
이제 서버를 시작 해 봅니다.
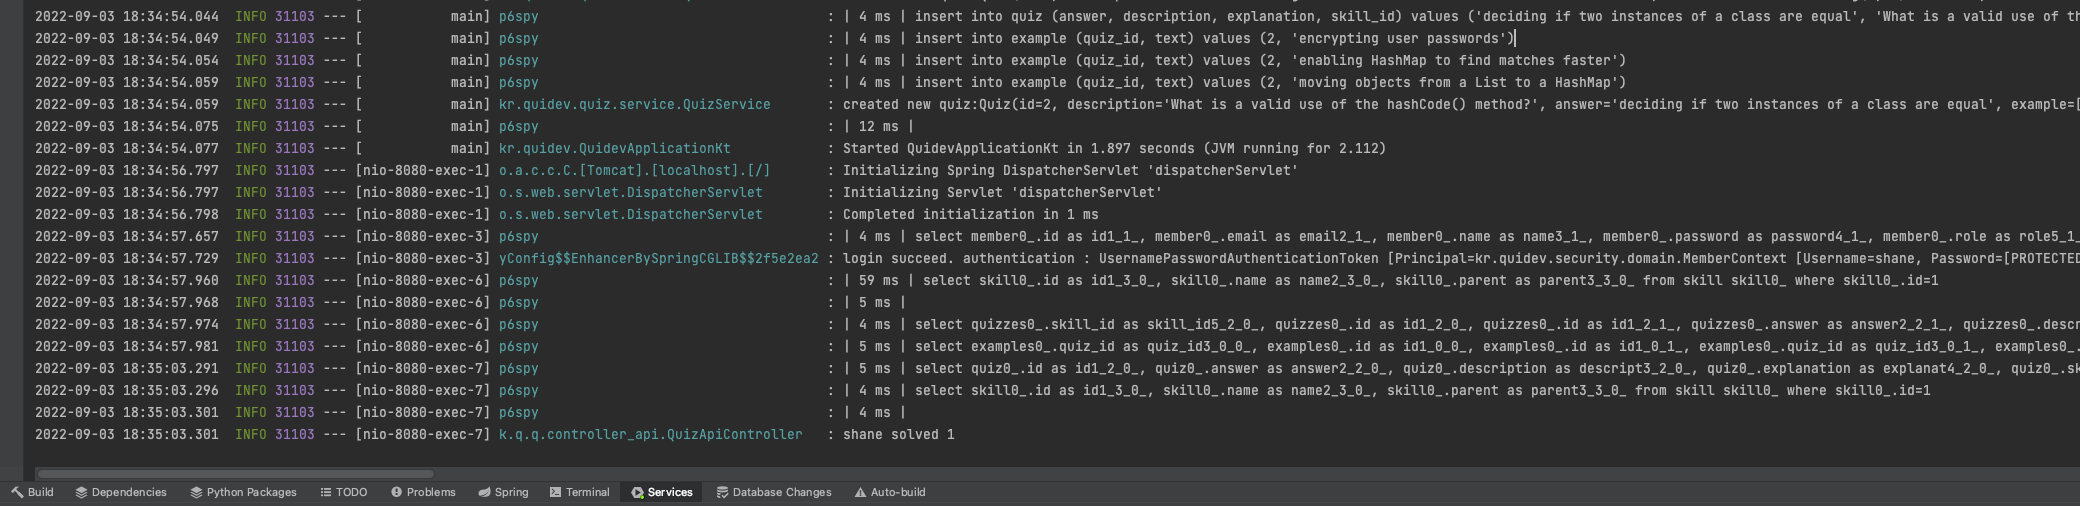
이제 쿼리와 함께 파라미터가 확인 됩니다!
쿼리가 한줄로 나오는건 아쉽지만, p6spy-spring-boot-starter 로 변경 한 후에 진행 해 보겠습니다.
p6spy-spring-boot-starter
스타터를 활용 하면 datasource를 변경 하지 않고도 설정이 가능합니다.
위에서 변경 했던 datasouce 및 logging 설정등을 지우고 스타터로 간편하게 설정을 해 보겠습니다.
applcation.yml 에서 삭제되는 라인들
logging:
  level:
    p6spy: info
spring:
    datasource:
        driver-class-name: com.p6spy.engine.spy.P6SpyDriver
    # url 에서는 추가했던 p6spy: 부분만 제거
    url: jdbc:postgresql://localhost:5432/quidev
build.gradle.kts 에서 implementation("p6spy:p6spy:3.9.1") 를 제거 해 줍니다.
후에 의존성 추가부터 다시 해 줍니다.
build.gradle.kts
implementation("com.github.gavlyukovskiy:p6spy-spring-boot-starter:1.8.0")Maven
<dependency>
    <groupId>com.github.gavlyukovskiy</groupId>
    <artifactId>p6spy-spring-boot-starter</artifactId>
    <version>1.8.0</version>
</dependency>
Gradle
implementation 'com.github.gavlyukovskiy:p6spy-spring-boot-starter:1.8.0'스타터를 이용하면 spy.properties 파일도 필요 없습니다. 아까 설정파일을 남겨 둔다면, 설정 한 대로 출력이 되고 spy.properties 파일을 작성 했다면 설정대로 로그가 출력 됩니다.
정말 간단하죠. 대신 기본적으로 p6spy가 활성화 되어 버리는데, 운영환경에서는 성능에 영향을 주고, 쿼리 하나하나를 다 확인 할 필요가 없기 때문에 설정을 따로 해 주시는게 좋습니다.
기본 설정
decorator:
  datasource:
    p6spy:
      enable-logging: false
개발 환경 프로필
decorator:
  datasource:
    p6spy:
      enable-logging: true
Spring Boot 3.0.x
스프링부트 3.0 버전으로 업데이트 하고 난 후로 P6Spy가 정상적으로 작동하지 않았습니다. 이는 아직 P6Spy가 Spring Boot 3.0.0 버전을 정식으로 지원하지 않고 있기 때문인데요..
https://github.com/gavlyukovskiy/spring-boot-data-source-decorator/pull/78
implementation("com.github.gavlyukovskiy:p6spy-spring-boot-starter:1.9.0")버전부터 Spring Boot 3.0.0에서도 정상 작동되도록 마이그레이션이 완료 되었습니다. 확인해본 결과 잘 작동합니다.혹시 이후에 또 버전이슈가 발생할 때를 대비해서 기존의 해결 방법은 남겨두겠습니다.
제가 사용하고 있는 p6spy-spring-boot-starter 버전은 implementation("com.github.gavlyukovskiy:p6spy-spring-boot-starter:1.8.1") 이며 이 경우에는 아래와 같은 추가 설정이 필요했습니다.
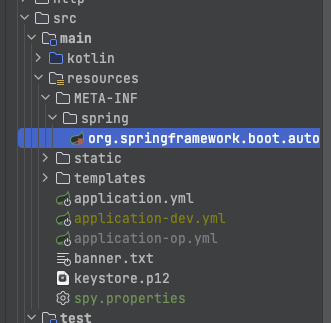
resources/META-INF/spring/경로에 아래와 같은 내용을 가진org.springframework.boot.autoconfigure.AutoConfiguration.imports파일 추가하기
org.springframework.boot.autoconfigure.AutoConfiguration.imports
com.github.gavlyukovskiy.boot.jdbc.decorator.DataSourceDecoratorAutoConfiguration
resources/경로에 아래와 같은 내용의spy.properties파일 추가하기
spy.properties
appender=com.p6spy.engine.spy.appender.Slf4JLogger
이렇게 두개의 파일을 추가 할 경우 P6Spy가 Spring Boot 3.0 버전에서도 정상 동작함을 확인 했습니다.
멀티라인 적용하기
이제 위에서 적용하지 못했던, 쿼리를 이쁘게 출력하는 작업을 해 보도록 하겠습니다.
그 전에 먼저com.github.gavlyukovskiy.boot.jdbc.decorator.p6spy.P6SpyProperties.java 파일을 살펴보겠습니다.
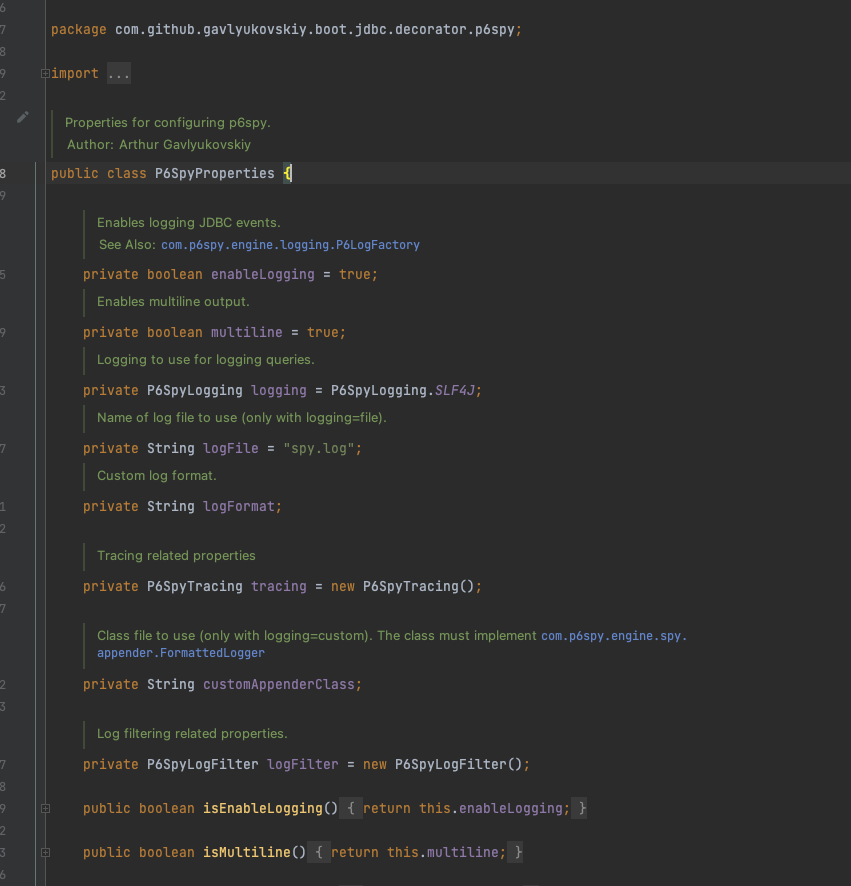
여러가지 기본 설정을 해 두었기 때문에, 따로 설정파일이 없어도 작동을 하는 것 이었는데요. spy.log 파일이 있으면 읽도록 코드가 작성 되어 있습니다.
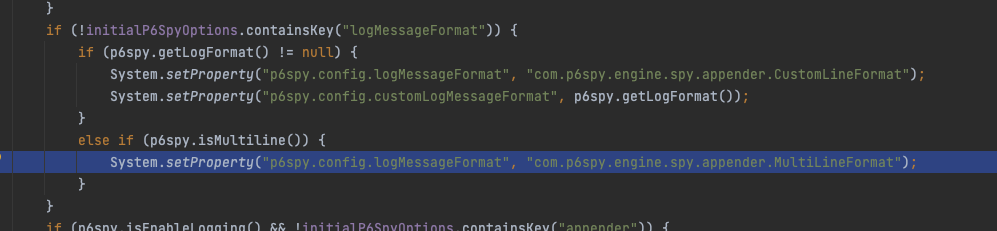
P6SpyConfiguration.java
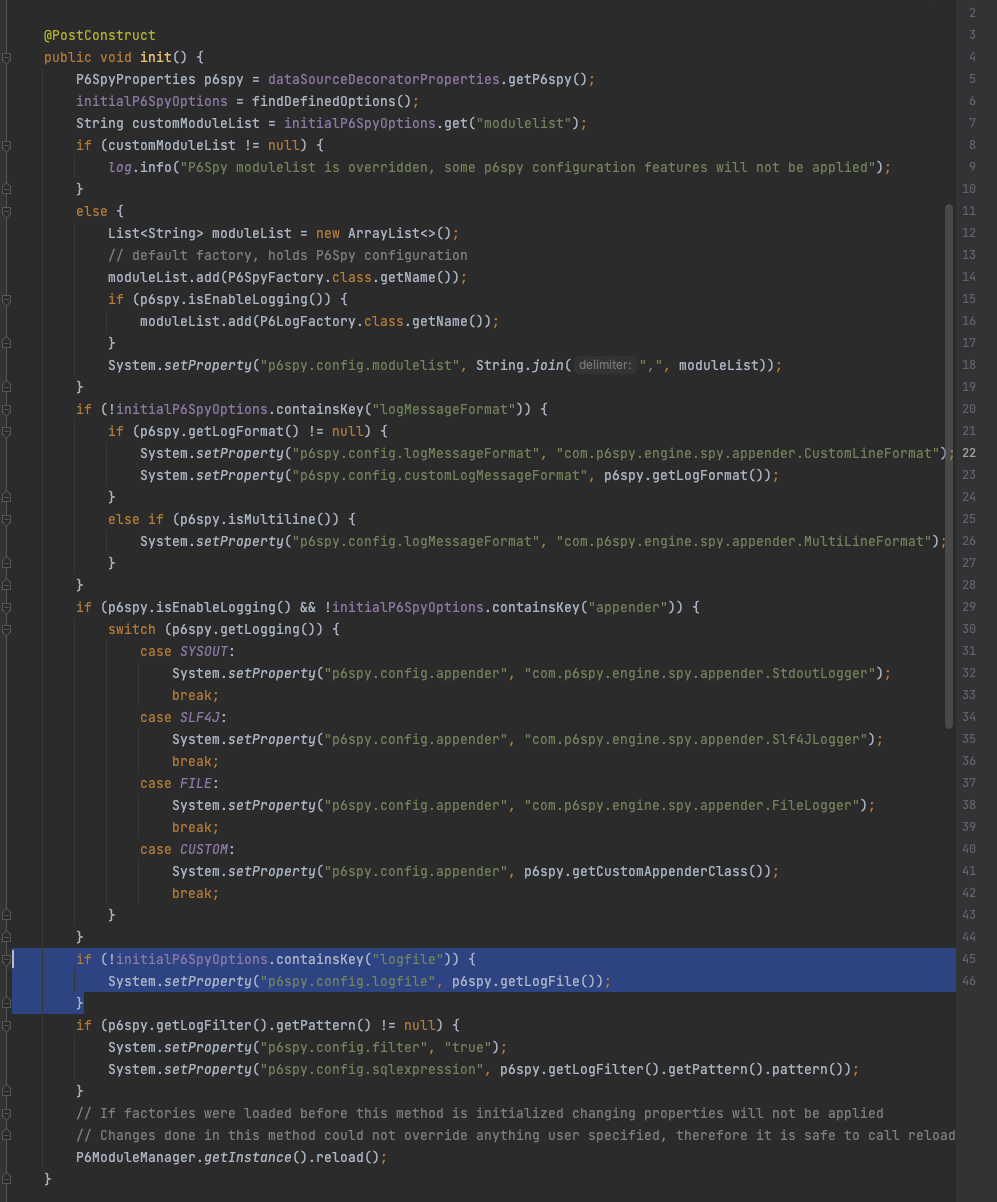
init() 과정에서 logfile이 있다면 활용하도록 되어 있습니다.
그런데 init 부분을 자세히 보면 MultiLineFormat 으로 logMessageFormat을 설정하는 부분이 있습니다. 분명 P6SpyProperties 에서는 multiline이 true로 되어 있는데요
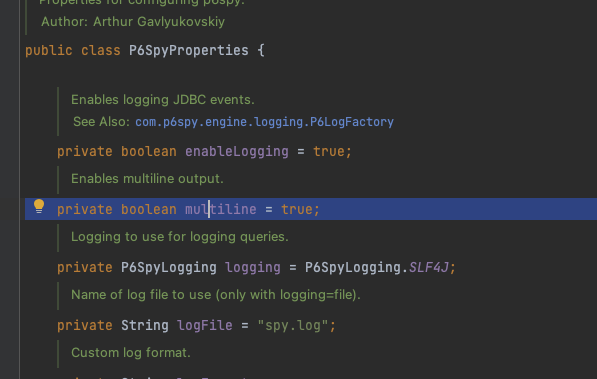
왜 멀티라인 sql 로그가 적용이 되지 않았을까요?
MultiLineFormat 을 확인 해 보면 될 것 같습니다.
com.p6spy.engine.spy.appender.MultiLineFormat
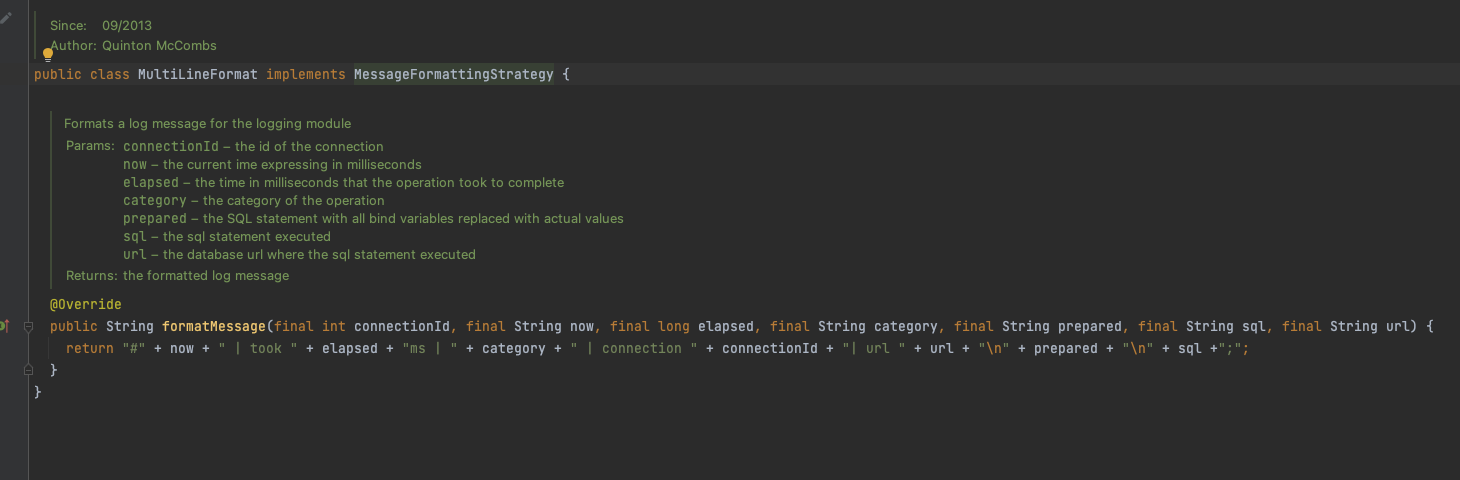
아... 따로 멀티라인에 대해 구현이 되어 있지는 않습니다.
포맷터를 새로 구현하는 수 밖에 없겠습니다.
새로운 포맷터는 https://github.com/p6spy/p6spy/issues/308 를 참고 해서 작성 하였습니다.
저는 코틀린 프로젝트라서 코틀린 코드로 작성 했지만, 바로 이어서 자바로도 작성 해 두었습니다.
PrettySqlFormat.kt
package kr.quidev.util

import com.p6spy.engine.logging.Category
import com.p6spy.engine.spy.P6SpyOptions
import com.p6spy.engine.spy.appender.MessageFormattingStrategy
import org.hibernate.engine.jdbc.internal.FormatStyle
import org.springframework.context.annotation.Configuration
import org.springframework.util.ClassUtils
import java.util.*
import javax.annotation.PostConstruct

@Configuration
class PrettySqlFormat : MessageFormattingStrategy {

    @PostConstruct
    fun setLogMessageFormat() {
        P6SpyOptions.getActiveInstance().logMessageFormat = this.javaClass.name
    }

    override fun formatMessage(
        connectionId: Int,
        now: String?,
        elapsed: Long,
        category: String?,
        prepared: String?,
        sql: String?,
        url: String?
    ): String {
        return "\n[$category] | $elapsed ms | ${formatSql(category, sql)}"
    }

    private fun stackTrace(): String {
        return Throwable().stackTrace.filter { t ->
            t.toString().startsWith("kr.quidev") && !t.toString().contains(ClassUtils.getUserClass(this).name)
        }.toString()
    }

    private fun formatSql(category: String?, sql: String?): String? {
        if (sql != null && sql.trim().isNotEmpty() && Category.STATEMENT.name.equals(category)) {
            val trim = sql.trim().lowercase(Locale.ROOT)
            return stackTrace() + if (trim.startsWith("create") || trim.startsWith("alter") || trim.startsWith("comment")) {
                FormatStyle.DDL.formatter.format(sql)
            } else {
                FormatStyle.BASIC.formatter.format(sql)
            }
        }
        return sql
    }
}
sql을 확인 해서 sql문이 비어 있지 않을 경우에는 org.hibernate.engine.jdbc.internal.Formatter 를 구현한 포매터를 이용 해서 sql을 새로 포맷 해 주는 코드 입니다.
추가로 쿼리를 호출한 코드를 추적 할 수 있도록 호출 스택 트레이스도 간단하게 제공 하도록 하였습니다.
자바로 작성하실 경우에는 아래 처럼 작성 하면 됩니다. (호출 스택 부분은 빠졌습니다, 호출 스택을 넣고 싶은 분은 위의 코틀린 코드를 참고 해서 작성 해 주세요)
import com.p6spy.engine.logging.Category;
import com.p6spy.engine.spy.P6SpyOptions;
import com.p6spy.engine.spy.appender.MessageFormattingStrategy;
import org.hibernate.engine.jdbc.internal.FormatStyle;
import org.springframework.context.annotation.Configuration;

import javax.annotation.PostConstruct;
import java.util.Locale;

@Configuration
public class P6SpySqlFormatter implements MessageFormattingStrategy {

    @PostConstruct
    public void setLogMessageFormat() {
        P6SpyOptions.getActiveInstance().setLogMessageFormat(this.getClass().getName());
    }

    @Override
    public String formatMessage(int connectionId, String now, long elapsed, String category, String prepared, String sql, String url) {
        sql = formatSql(category, sql);
        return String.format("[%s] | %d ms | %s", category, elapsed, formatSql(category, sql));
    }

    private String formatSql(String category, String sql) {
        if (sql != null && !sql.trim().isEmpty() && Category.STATEMENT.getName().equals(category)) {
            String trimmedSQL = sql.trim().toLowerCase(Locale.ROOT);
            if (trimmedSQL.startsWith("create") || trimmedSQL.startsWith("alter") || trimmedSQL.startsWith("comment")) {
                sql = FormatStyle.DDL.getFormatter().format(sql);
            } else {
                sql = FormatStyle.BASIC.getFormatter().format(sql);
            }
            return sql;
        }
        return sql;
    }

}
이제 프로젝트를 다시 실행 해서 SQL의 멀티 라인이 적용 되었는지 확인 해 봅니다.

쿼리가 훨씬 보기 좋아졌으며, 파라미터도 정상적으로 포함 되어 있습니다.
마치며
JPA가 생성해주는 쿼리를 로그로 확인하는 방법을 단계적으로 알아 보았습니다.
사실 show-sql 만 하더라도 대부분의 상황에서는 충분하기는 한데, 원하는 대로 쿼리를 확인하기 위해서는 제법 많은 노고가 필요했습니다.
그래도 한번 설정 해 두면 다음부터 편하게 확인을 할 수 있으며, 다른 프로젝트를 할 때에도 손쉽게 설정을 할 수 있기 때문에 P6spy 사용법은 한번쯤 익혀 두는게 좋다고 생각합니다.
이상입니다. 감사합니다.
References
'Programming > JPA ⁄ Spring' 카테고리의 다른 글
| [Spring] @PageableDefault 혹은 @SortDefault 여러 컬럼으로 정렬하기 (0) | 2022.09.17 |
|---|---|
| [Spring] mockMvc 스프링 시큐리티와 연동하기. @AuthenticationPrincipal 파라미터 전달 해결 (0) | 2022.09.13 |
| [Spring Boot] git 정보 확인하는 endpoint 작성하기 (0) | 2022.06.24 |
| Spring) 스프링의 "redirect:" 리다이렉트 처리 (1) | 2022.05.13 |
| Spring) 필드 인젝션의 해로움 _생성자 주입을 사용해야 하는 이유 (0) | 2022.05.12 |